Custom Batch Processing with Topaz Photo
You will want to create some ‘preset’ recipes before you do batch processing of photos using Topaz Photo. For me, I have two main recipes; I use one recipe for raw-format shots straight from my camera, and another recipe for DNG-format shots like those I save after doing focus-stacking with my HeliconFocus.
TopazPhoto will automatically apply noise reduction when it gets raw-format shots, but it won’t automatically do this when given DNG shots, even though they are technically still raw-format shots.
Also keep in mind that you won’t get any automatic AI treatment for masking of shots when doing regular batch processing (non-Autopilot). This means that you probably should specify the mask (such as ‘All’) for any sharpening in your recipes.
I have found that you will get settings applied twice to the first shot in the set of selected shots when you apply a recipe (preset). To avoid this, you can select all files except the first shot (using shift-mouse-click) or Ctrl-click for ranges of shots, followed by:
Right-click→Apply→Preset→Saved-preset-name. The bottom of each photo thumbnail will turn black to indicate that it is in the set of selected shots.
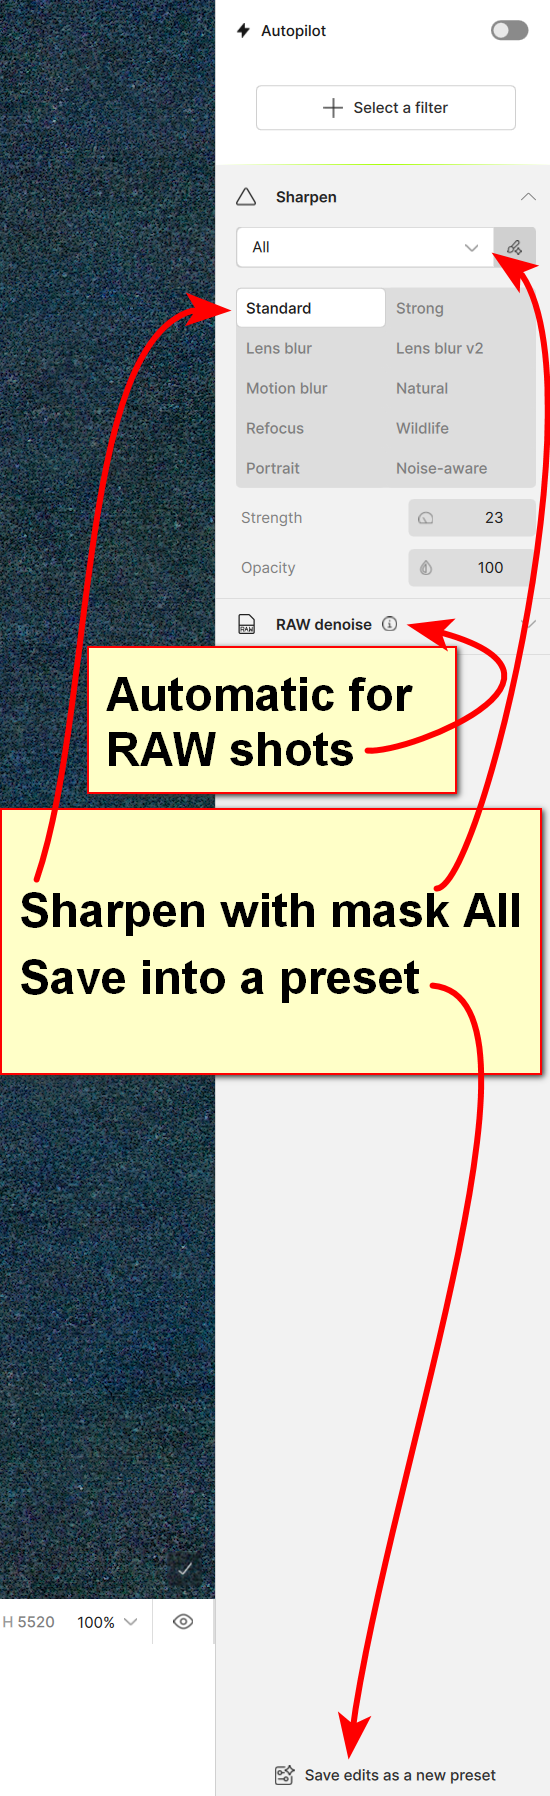
Save a Preset to use later
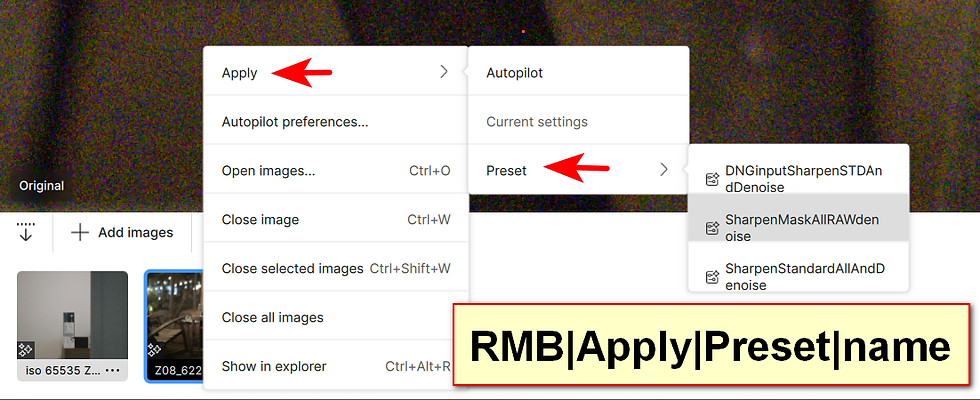
Apply a preset to the selected shots
After the preset has been applied to the set of selected shots, you can hover the mouse pointer over any shot thumbnail in the filmstrip and look at the pop-up to see what settings will get applied to it.
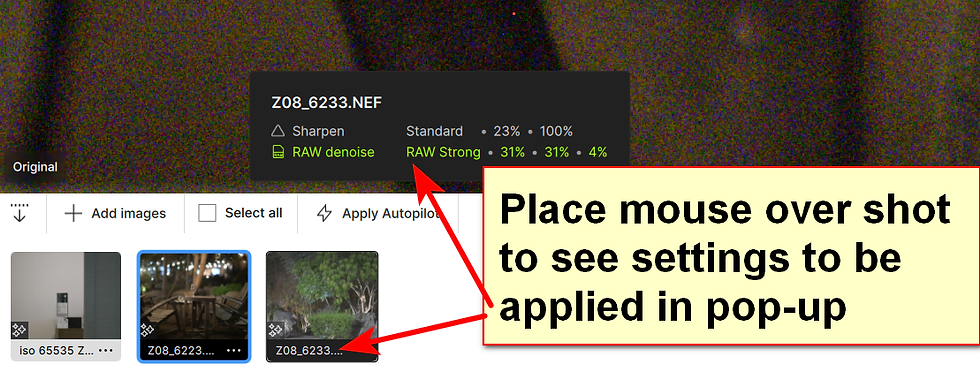
Settings that will be applied to the selected shot
Notice in the image above that the pop-up shows “RAW denoise…” in green. The green text indicates that this setting that you didn’t request will be applied. The setting(s) in white text will also be applied. If you see something that you don’t want (such as the same setting applied multiple times), you can select that image and then delete the unwanted filter by clicking the little ‘trashcan’ icon next to that filter in the filter list. The applied filters appear on the screen right-hand side beneath the “+ Select a filter”.
If you happen to have a few shots in the set of photos that need some different filters than your selected preset applies, no problem. Just select the photo in question from the filmstrip and adjust the filters to apply to it. You can add or delete the filters for just that single shot.
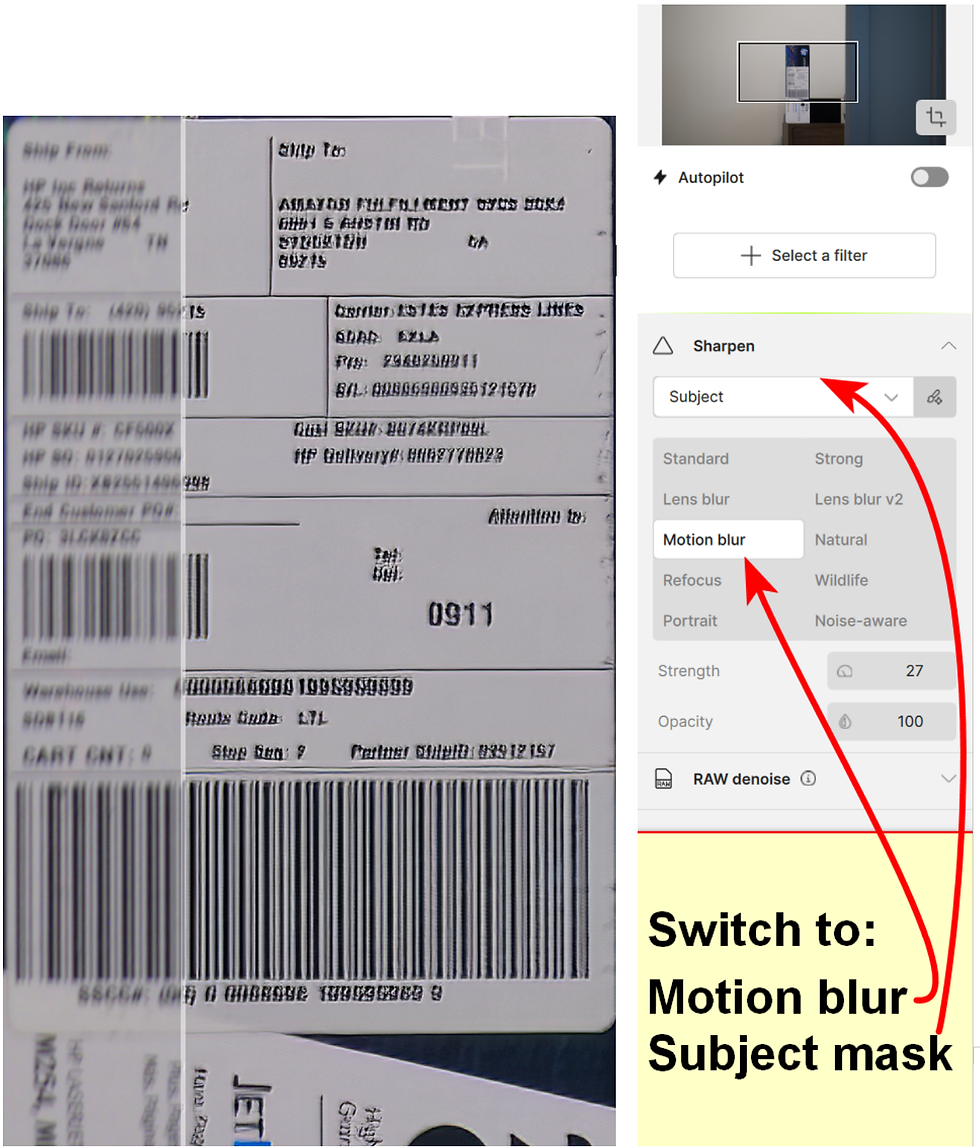
Different Sharpen filter and mask
For example if you have one shot that has some subject motion blur, then you would select that shot, select the Sharpen filter, change the mask from “All” to “Subject”, and then change the “Standard” sharpening to “Motion blur”. If the whole frame was showing motion blur, then you would leave the mask set to ‘All’. Note that the pop-up over the photo thumbnail at the bottom of the screen will mention the type of sharpening, but it won’t indicate the type of mask being used.
Just because you’re doing “batch processing”, that doesn’t mean that every single shot has to get treated the same! You can customize the shots that need it.
When you’re happy with the settings for each shot, there are a couple of steps left to begin batch processing. First, click the “Select all” checkbox to ensure that every shot in the filmstrip is selected. Next, click the “Export * images” in the upper right-hand corner of the program.
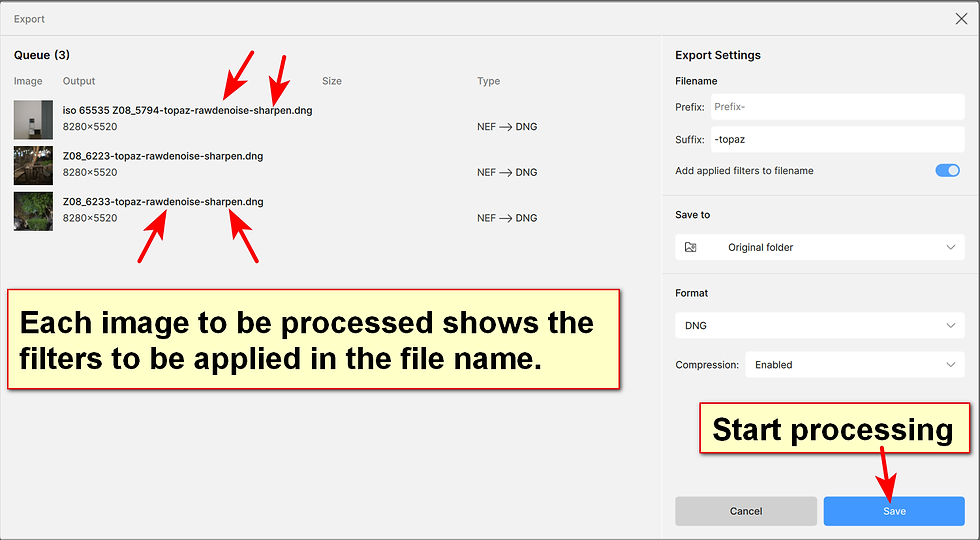
Verify file names show desired filters to apply in the Export dialog
Be sure to review the file name of each shot that is going to get processed. If you see a repeated filter in the file name, then you should click “Cancel” and go back to that shot to delete the duplicate filter. Note that the file names are a bit generic, such as “sharpen” instead of which kind of sharpening filter.
If the file names all indicate the desired filters and the appropriate file output format is set (DNG is shown above), then click “Save” to start the batch processing. You’ll get a continuous progress report while the shots are being processed. I’d recommend that you export the photos in DNG format, to retain the best quality. There are some filters that don’t allow you to save the results in DNG format; in that case, TIFF format is probably the best choice.
After the processing is done, you can go back to import more images or else quit TopazPhoto. You’ll probably want to import the output files into another photo editor for further processing.
When you have lots of images that need noise removal or sharpening, batch processing is the best way to go.


Comments