Search Results
228 items found for ""
- Using ON1 Photo RAW 2023 for Sky Swapping
The ON1 Photo RAW 2023 editor is a full-function photo editor that uses artificial intelligence for many of its features, which includes smart masking, smart noise reduction, smart sharpening, and of course sky swapping. This editor supports up to 14 layers and includes focus-stacking, multi-file HDR, panorama stitching, and plug-in support. Due to the many AI features, you’ll need a pretty modern computer with a good GPU in it, or else you will end up spending a lot of time waiting for tasks to complete. In this article, I’ll focus on the “sky swapping” feature. The editor comes with many built-in skies, but it also lets you import your own sky photos and therefore extend its library of choices. There are many photographers whose blood would boil at the mere thought of replacing the sky in a landscape with some ‘fake’ sky. If that’s you, then this feature is definitely not for you. The Sky Swap feature utilizes AI to do its masking, which means that you can replace a sky in mere seconds when the masking works properly. As I quickly found out, however, it doesn’t always mask correctly. When this happens, there are many helpful adjustments and manual masking tools to clean up masking problems. It’s tempting to get a little lazy and always pick a built-in sky image to use with your photos, but that would lead to many of your shots having an embarrassing amount of repeated skies. I’ll show you how easy it is to add your own shots into the sky library, so that you don’t fall into this trap. Before you start swapping skies, I’d recommend that you go into the Edit | Preferences… | System and change the “Auto” default to whatever your system hardware really is. I ran this editor on a laptop (Intel HD Graphics 4600 GPU) using both the “Auto” setting and also specifically the Intel GPU setting. The AI features all failed miserably with these settings. When I specified the “CPU” option for the AI Processor, then all features worked normally, although at quite a slow pace. Featureless sky replaced with dramatic clouds AI did a great job at complex masking to swap this sky The examples above show what artificial intelligence is capable of doing with complicated masking tasks. The black-and-white shot uses my own cloud image, while the color shot above uses one of the canned ON1 cloud images. To add new sky images to the ON1 library, you begin by clicking Import in the Sky tab: Add images for sky swapping The image file types that are allowed for skies are basically the same files allowed by the ON1 editor for general image editing. File types include jpeg, png, tiff, camera ‘raw’ files, and Adobe DNG. Import dialog Click the ‘Import’ button, and then you can browse to where your sky images are that you want to add to the library. Select the sky image(s) to add to the ON1 sky library In the screen shot above, I’m selecting raw image files from a Nikon camera. Place the selected images into an existing category or a new one If your image files are acceptable, you’ll get a ‘success’ dialog Select a custom category of sky shots The custom category is now available with your skies After clicking the “Sky” tab, the editor will start an AI masking operation of your photo being edited. Click the little ‘mask’ icon to get masking options You get a little icon showing the masking results, shown in black-and-white. If you click this little icon, you get several masking options displayed. You can then click the “View” button to see the mask overlaid on your image being edited, to see how good of a job the AI masker did. If the mask is fine, then you can just re-click the “View” button, and the mask overlay will disappear. Sub-standard masking job Clicking the “View” button gets the AI-generated sky mask to display. As shown above, it didn’t do a particularly good job. The masking tools just below the “View” button can help clean up the mask, though. The red color here is where a replacement sky won’t get placed. Manual mask fixes As shown above, the “Levels” control has 3 sliders on it. By moving those sliders (the little circles) to the left, the horizon line mask gets considerably better. Using the masking brush (left side of editor) the little spots still left can be erased. Make sure that the masking brush shows a little “-“ in it. If it shows a “+” instead, then click “Shift-X” to toggle the mode from “paint in” to “paint out” (erase). To change the size of the masking brush, use the bracket keys [ ]. If you aren’t using a custom category, then just click the “Category” underneath “Sky:” and then click the “v” underneath the category to select the exact sky you want to use. As you scroll over the different skies, you’ll see it overlaid on your photograph and replacing your original sky. Additional fixes As shown above, I adjusted the new (custom) sky’s brightness, I lowered the foreground brightness (to look more like it’s in shade), and I clicked the “Reflection” button, since this shot also has a body of water in it. The clouds shown above were tone-mapped a bit using HDR Efex Pro 2, prior to importing the shot into the sky library. With this sky replacement feature, I can now separately control the look of the sky and the look of the ground. Final shot In the final photo, you can see that I changed it from being originally a sunny day into a cloudy day. I doubt that anyone would ever know that the sky was totally altered. Summary I purchased the ON1 Photo RAW 2023 editor for its sky replacement feature. I could have purchased the ON1 Skyswap AI program for even less money, but then I wouldn’t have gotten the full-featured editor. I really enjoy the ability to get much more dramatic skies than I normally encounter. Now, I take the opportunity to shoot only skies sometimes, in order to expand the size of my custom sky library. Having more options for getting better skies than what I often encounter while out shooting landscapes is great. Like pretty much everything else, the ON1 Photo RAW 2023 isn’t perfect. With a little extra work, though, it can produce some really amazing photographs. Originally a cloudless day
- A Full-Time Bubble Level on Your Camera
Photographers are familiar with tripod heads with bubble levels on them, and some camera models offer virtual horizon features. But have you heard of a level for your camera that’s always available, even when your camera is turned off? I found out about a little bubble level that fits into my rarely-used camera hot shoe. If I use artificial lighting, it’s nearly always off-camera; my camera hot shoe just sits idle. Now, my hot shoe has made itself useful. Bubble level in a Nikon Z9 hot shoe Bubble level end view The bubble levels on my tripod heads often make me have to crouch down and move side-to-side to see them. Having the information right on the top of the camera is much more convenient. The bubble levels I got are from a company called Fire Rock, and they are sold in 3-packs. They fit standard hot shoes, such as Canon, Nikon, Fuji, and Olympus. They’re made out of a firm rubber, so they’re not brittle. They slip easily into the hot shoe, without any tendency to fall off. Several other companies offer them, but I suspect they all come from one source. These levels are totally cheap (less than $2.50 each) and don’t get in the way. The obvious question is: “Are they accurate?” For the levels that I got, the answer is “yes”. I used a 4-foot carpenter’s level to verify that a tabletop was level, and then placed my camera bodies onto the table. I verified that the bubbles were centered when mounted in the hot shoes. There are often occasions when you need to place your camera at a really low level, below what you could obtain with a tripod. With a top-mounted level like these, you can still manage to get properly levelled shots. It's never a good idea to leave your camera hot shoe unprotected. This little bubble level can work double-duty to protect the hot shoe from damage. These levels seem like such a great idea that I just had to pass the word along about them.
- Build the World’s Most High Tech Pinhole Camera: the Z9
How did people do photography before they could buy lenses? They built pinhole cameras, of course. All they would need was a light-tight box with some film inside it. The first mention of creating a pinhole camera comes from David Brewster in 1856, which actually predates the founding of Adorama or B&H photo… Nikon Z9 with 45mm pinhole lens The idea of viewing images through pinholes goes back as far as the 5th century B.C. as a matter of fact. Even in modern times, I’ve seen people who forgot their reading glasses put 3 fingertips together to be able to read what’s on the menu by looking through the little gap between those fingers. I thought I’d goof around and see what it takes to turn my Nikon Z9 into maybe the world’s fanciest pinhole camera. I wanted, of course, to make this pinhole lens interchangeable and reasonably robust. I found a website at pinhole.cz where a guy named David Balihar created a free program called PinholeDesigner. His site also has some fun information on making pinholes, and he includes a fun pinhole photo gallery. David’s program uses a formula developed by Lord Rayleigh in 1891, which determines the best pinhole diameter for a desired focal length and light color. The “best pinhole diameter” means that it yields the sharpest image, or maybe the least lousy image. I quickly discovered that optimal pinholes are really, really small. The smallest sewing needle I could find has a diameter of about 0.71mm. I found some straight pins as small as 0.57mm. I wanted to design a 45mm lens, and it needs a pinhole diameter of 0.3mm (half as big as a straight pin). I own a precision caliper to make measurements like this. I decided that I’d make a pinhole in the bottom of a soda can, where I’d pierce the metal with a sewing needle. I would try to limit the hole size by only letting a portion of the needle’s taper pierce the metal. I accomplished this feat by placing the aluminum can against a hard metal surface, and then pounding the needle through the can until it was stopped by this hard metal. This procedure also kept the aluminum can bottom from deforming while I was pounding on it. I chose a soda can bottom for the pinhole material because of its shape. A section of a sphere is very strong. Aluminum is an easy material to work with, and there is no concern about either corrosion or having it degrade with exposure to sunlight. And it’s cheap; I didn’t want any big investment in this fun little experiment. My basic lens design was to use a lens adapter (I have both the Nikon FTZ adapter and the cheap Minolta Fotasy adapter) and then add extension tubes onto the adapter. Using extension tubes, I have lots of options on the focal length. The pinhole in the soda can bottom neatly slips over the extension tubes. A bit of double-stick tape keeps the can bottom in place. After I got a really, really small puncture in the can, I rounded it out by gently rolling the needle tip in this hole with my finger tips. If the pinhole isn’t round, it will cause very poor image quality. I would also sand both sides of the hole in the can, to get the surface as smooth as I could. I used a powerful magnifier to make sure the hole looked reasonably good. Some tools used to make a hole in the can bottom First, I cut the can bottom using scissors; the thin aluminum is fairly easy to cut. I used vice grips to hold the needle; holding the needle in your fingers is too dangerous. I placed the can bottom onto a rounded metal fence post cap, so the can wouldn’t buckle as I pounded the needle through the aluminum can while using the hammer. Fence post cap, used like an anvil to hammer against After each tap on the needle, I would check the can to look for light coming through. As soon as I saw some light, I stopped pounding. I then rotated the needle tip in the tiny hole on both sides of the can until the hole was smooth and round. I also sanded both sides with fine sandpaper. I used my magnifier to monitor my progress, and repeated the steps until the hole looked good. I don’t know the final hole diameter, but it looks like about half of the size of a sample piece of can where I pierced the metal using the 0.57mm straight pin. My goal is to end up with a hole diameter of about 0.3mm, so that I can make a 45mm lens. Tiny hole in can center, about 0.3mm diameter Lens adapter with extension tubes and tape The shot above shows my Minolta Fotasy lens adapter (a hollow metal tube without any electronics). The extension tubes are mounted on the end of the adapter, which yields a focal length of about 45mm. This combination is slightly longer than 45mm, but the curved can bottom goes a bit inside the tubes. There’s some double-stick tape on the tube surface, so that the can bottom will stay in place after it’s slipped over this adapter/extension tube combination. Can slipped over the extension tubes and lens adapter Once the can bottom with the hole is slipped over the adapter, it needs to get sealed against light leaks. I used some black electrical tape for this purpose. The shot at the top of this article shows the completed assembly. If I wasn’t so lazy, I would have painted the shiny aluminum with some flat black spray paint (but mask the pinhole). Pinhole Designer showing diameter needed for 45mm lens The shot above shows the Pinhole Designer in action. Note that the light wavelength is for green light (550nm, or 0.00055mm). My lens has a calculated aperture of f/151. My tested aperture turned out to be really close to this value. After I made the lens, I compared shots of subjects against another camera with its lens zoomed to 45mm. This pinhole lens does indeed cover a 45mm lens field of view almost exactly. Now you know how I ended up with the 45mm focal length and the 0.3mm pinhole design. I just relied on this Pinhole Designer program. Lens Performance First, the good news: focus speed happens to match the speed of light. Chromatic aberrations are nearly absent. Optical distortion is near zero. Vignetting performance is good. Astigmatism is the lowest I’ve ever seen. Now for the bad news. Make no mistake: pinhole camera lens resolution is crap. Contrast is even worse. I thought I’d try to get some numbers on just how bad the lens performance actually is. Focus chart with measurements added Chart section up close: MTF50 resolution is about 4.9 lp/mm The focus chart image looks simply terrible. The black square edges look mushier than any results I have ever seen with a lens. I consider resolution to start looking sharp at about 30 lp/mm. Really professional lenses get MTF50 resolution measurements in the 60’s and 70’s. These pinhole results show a peak performance of 4.9 lp/mm. Most of the little targets can’t even get measured. Embarrassing. MTF contrast plot These are the lowest readings I have ever observed. The only good news is that the meridional and sagittal values are the same, which means that there is no astigmatism. I made all of these measurements using the MTFMapper program by Frans van den Bergh. I actually had to alter the program's "threshold" value before it could even see the chart details, because they were so fuzzy and low contrast. Sample photos Fountain 1/5s, ISO 400, sunshine. Mexican palm 1s, ISO 100. Sunshine. Statue up close, shade. 6s, ISO 100 Rusty the Rabbit, 1/160s ISO 12800. Hand-held, sunshine Succulent Close-up, hand-held. 1/100s ISO 12800. Summary If you ever want to take shots that look like they were made in the 1800’s, this is a way to do it. You might want to convert them to black and white first, though. And sepia tint. Close-up shots actually look a lot like they might be a painting. Landscapes have everything look equally sharp (or unsharp). I found this to be a really fun exercise. To me, it’s just amazing that images can be made with no optics at all. With modern cameras being so good at high ISO’s, you can actually get away without using a tripod while shooting at f/151! You probably want to stick with mirrorless cameras for pinhole 'lenses', so you get to see a bright image while shooting.
- Batch Processing: Capture One and Topaz DeNoise
If you have a computer that doesn’t have a high-performance GPU in it, then Topaz DeNoise AI probably takes seemingly forever to process your photos. Artificial intelligence can do amazing things, but the amount of processing it can take is mind boggling. If you can instead batch-process your shots, then all you need to do is start the processing and then go do something else until the computer finishes. This article will show you how to batch-process photos if you use both Capture One 22 and Topaz DeNoise AI. A really great feature of Topaz DeNoise AI is the ability to use a different algorithm on each individual photo, even while performing batch processing. Select the photos in the Library module For starters, you should do all of the editing steps you normally do on your photos, but skip any noise reduction or sharpening. The Topaz program is an expert at these steps, and it’s going to be better than your photo editor. Next, pick the desired (edited) photos to batch-process in Topaz from the Capture One Library module, using Ctrl-Click with the mouse. Right-mouse click and select Edit With | Topaz After all of the photos are selected in the film-strip area of the Library module, then click the right mouse button and select Edit With | Topaz DeNoise AI.exe. Select ‘Edit Variants’ When the dialog shown above appears, select the desired file format, and then click ‘Edit Variants’ to create the new files that will be created by Topaz. All of your Capture One edits will be included in the Topaz files by default. Topaz will automatically begin running and then show the files to be processed. Select the photos suitable for a particular algorithm Select (via the left-hand checkboxes) the photos to apply the desired de-noise algorithm, and click above on the algorithm name in the corner of the photo. Next, un-check (deselect) these photos and then check another set of photos to apply a different algorithm. After they’re selected, click the algorithm name in the photo corner above for that desired algorithm to use. You can, of course, merely check “Select All” and then choose a single algorithm to apply to the entire set of photos for batch-processing. After all photos have the desired algorithm to be used, click on the ‘Apply’ button. Progress screen processing the first set of shots You will be shown a progress screen, while Topaz runs the first algorithm on the appropriate photos. After batch processing finishes, you can select the next set of photos and ‘Apply’ to those. Processing selected photos using the next algorithm After the final set of photos is finished, you’ll be returned to Capture One. Back to Capture One You’ll be returned back to the Capture One Library module, and you can see that the photos edited by Topaz will be included in the set of pictures in the filmstrip at the bottom of the screen (in the requested file format). The Topaz program automatically closes after it finishes processing the photos. This procedure for processing several photos is much more efficient than using Topaz one-at-time, especially if you don’t have a really advanced GPU in your computer. And if you aren’t even using Topaz, maybe you should consider getting it; the difference in quality is worth this effort.
- How to Perform Helicon Focus Image Retouching
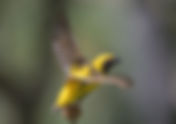
Not every focus stack goes smoothly. Reality often gets in the way, with things like moving subjects and wind. Helicon Focus has an advanced feature to help you save otherwise ruined focus stacks. What follows is a scenario where I took a 20-shot focus stack, using a Nikon Z9 with its “focus shift shooting” feature. Despite what people typically assume, focus stacks are just as useful for large subjects as they are for macro shots of tiny things like bugs. I took a stack of shots of a bird using my 500mm lens, where I wanted to get a thicker depth of focus, while using a wider aperture that gives the best resolution. If I had significantly stopped the lens aperture down, then diffraction would have ruined the resolution. It should get mentioned that landscape photographers often run into the problem of needing a deep depth of field, but stopping down their lens will ruin the resolution. Focus stacks can solve this problem, although they often run the risk of having the wind move some leaves or branches in one or more shots of the focus stack. Another reason you might want to bother with a focus stack is to get a couple of subjects into focus that aren’t positioned at the same focus plane. You can get a shot of each subject separately in focus, while trying to keep your camera still. The risk of unwanted subject motion is high, though. Extended depth-of-focus shot The shot above shows a bird with a larger depth of focus than what should be possible with the selected lens aperture. This is the result of a focus stack, even though there were a few problems getting here. First shot of a stack of 20 images You begin by using the Helicon Focus “Render” step, after first loading all of the images in the focus stack. Notice how a plant behind the bird’s tail is pretty out of focus, and then compare it to the cropped shot at the top of the article. You can see that I got a much deeper depth of focus by doing the focus stacking. Rendering disaster! Note in the screen shot above how the stacked image on the right has the bird’s head ruined. The bird moved while shooting the stack of shots, leaving a bunch of ghosts. The left-hand side of the screen shot shows the last photo in the stack, with the plant behind the bird being in focus and the bird totally out of focus. Select the ‘master’ shot to use for fixing the ghosts I selected the photo that would be used as the ‘master’ to clone its parts in place of the right-hand ghosted shot. This is the photo that has the bird’s beak in best focus. Select the ‘Copy’ option I next clicked on the “Copy parts from source image” option. There are several options that appear at the bottom of the screen to be used while doing the ‘copy’ action. The main thing I used was to set the diameter of the brush to use. Move the mouse over the part of the image to repair, as shown by the white circle in both images. Just hold down the left mouse button, and ‘paint’ over the defective parts of the stacked image. The master image portion under the circle will replace the ghosts in the stacked image. If the copying operation isn’t looking successful, you can click the “Undo” icon to get rid of the repair work and try again (the “X” icon). There’s a “clone” option next to the “copy” option that you could try, instead. The right-hand “?” icon will take you to an online help link that Helicon Focus has, to read more about using the program and its features. The repaired stack As shown above, the copying operation successfully got rid of the ghosting in the stacked shot. You can also see how the stacked shot has a deeper depth of focus that the un-stacked photo on the left. Save your results Once the retouching operations are done, you can then click the “Save” button in the “Saving” tab to finish saving the results. The saved photo can then be edited in other programs. Summary The image repair features in Helicon Focus can really save the day in an otherwise ruined image stack. You can’t always re-take the shots in an image stack, particularly when you don’t even know your subject moved until you’re back home processing the photos. Helicon Focus is a more useful program than many people realize. There are a lot more focus stack opportunities than just insect close-ups.
- How to add External Editors to Capture One 22
Capture One 22 doesn’t allow use of the Adobe-style plug-ins, but you can still use the executable-style forms of these editors. It’s pretty tricky to make them available inside Capture One, however. These same procedures I describe below will work for programs like the original Nik plug-ins and Topaz De-Noise AI. External editors are accessed by clicking the right mouse button in the photo to be edited while inside Capture One. The problem, though, is that these editors aren’t available as an option. How do you make these programs visible to Capture One? I’m going to show you how to do this from Windows. I’m going to demonstrate how to add an external editor by using the Viveza2 program as an example. Viveza2 comes in two formats, namely a plug-in (Viveza2.8bf) or as a stand-alone executable (Viveza2.exe). Capture One 22 can only use the .exe form. I have chosen to use the 64-bit versions of the external editors, as shown in the example below. Where is Viveza2? Inside Capture One, you would normally click the right mouse button, and select “Edit With” to pick the Viveza2 program. The only problem is that it’s not there! How do you configure Capture One to make Viveza 2 visible, so that you can select it? It’s true that you can select “Browse” to hunt for your external editor, but the very next time you want that editor, you’ll be forced to go hunting for it again. Very irritating. There’s a better way. Select a photo in Windows Explorer To begin, you’ll need to exit Capture One. Open up Windows Explorer. Navigate to a typical photo, such as a jpeg, tiff, png, dng, etc. Right-mouse click on the photo. Select “Open With” Click on “Choose another app” Scroll to the bottom of the dialog Click on “Choose an app on your PC” Locate the editor (Viveza2.exe) Browse to the desired external editor, such as the example Viveza2.exe, which on this computer is located in the folder “C:\Program Files\Google\Nik Collection\Viveza 2\Viveza 2 (64-bit)\”. Click on the file name, and then click “Open”. Click “Always” after selecting the executable file Note that “Viveza 2” is now selected in the list above. Click the “Always” button. It doesn’t matter that the example photo is a “Tiff” format. It could have also been a jpeg, dng, or another format. The program will start up, but you can choose to Cancel, since you don’t want to start editing yet. The program (Viveza 2) will close. Now, start up Capture One 22 again. Select a photo to edit. It doesn’t matter if it’s .NEF, .DNG, .TIFF or something else. Click inside the photo, while either in the Library or Adjust section. Now Viveza2 is available! Select the “Edit With” option You can now see that the example “Viveza2” is available! Just click on “Viveza2” in the list. Select suitable file format for Viveza2 Select a file format that your editor can use in the dialog that appears. Viveza 2 cannot edit raw format files, for instance. I chose “tiff” format in the example above, since Viveza 2 knows how to edit that file format. Capture One 22 will convert the photo, if needed, into the selected file format before sending it to the external editor (Viveza 2). Inside the Viveza 2 editor Now, you can edit your photo in the external editor (Viveza 2). When edits are finished, click on the “Save” button. You will be returned to the Capture One 22 editor, and Viveza 2 will automatically close. Note that Capture One will have the edited photo in the filmstrip, in your selected file format, which you can then edit further or else export it. You’ll need to repeat this exercise for every external program you want to use. I have configured my favorite external editors such as Silver Efex Pro 2, HDR Efex Pro 2, and Topaz Denoise AI using this same procedure. Now, I can easily run these programs from inside Capture One 22 without having to hunt for them any more. I need to add a word of caution about HDR Efex Pro 2. This program doesn’t seem to want to place its output in the same directory as the original photos. If you don’t want it to put stuff into your Documents folder, then you need to save the results by selecting File | Save Image As… After you’re done saving, then do a File | Quit. You’ll have to manually import it back into Capture One 22 if you want to do more editing on it. Messy.
- TT Artisan 50mm f/1.4 Tilt Lens Review
I got a copy of this full-frame lens in the Nikon Z mount, which I tested on my Nikon Z9. This manual-focus lens is offered in many different camera mounts, such as Sony E, Leica L, Fuji X, Canon RF, and Nikon Z. The main feature here is, of course, that the lens has a tilt and rotation feature. This TT Artisan has no electronics, so you have to add “non-CPU lens” information to the Z9, to tell the camera about the 50mm focal length and the maximum aperture of 1.4. The ‘exif’ image data will always indicate f/1.4, but you can still get automatic exposure. The ‘TT Artisan’ lens name stands for “The Thinking Artisan”. You’ll find a very rare real aperture ring on this lens, without any click stops. It has a cinema-like feel to it, especially with both the focus ring and aperture ring having cinema “follow focus” gears on them. The aperture has 12 rounded blades, which will give very round out-of-focus highlights. To get critical focus with this lens on a Z-mount camera, you will need to either use focus-peaking or else zoom in with the viewfinder to judge the focus via a magnified image. This lens isn’t meant for action shooting, so manual focus shouldn’t be a big issue. The focus ring has roughly 150 degrees of rotation from minimum focus to infinity, which feels about right. The focus and aperture rings are well-damped, without taking a lot of effort to twist. TT Artisan 50mm f/1.4 Tilt Lens on Nikon Z9 Top view, showing the tilt control and follow-focus gears Side view. Lens rotated 90 degrees and tilted down 5 degrees Why a ‘Tilt’ lens? The main reason to get a ‘tilt’ lens is to adjust the focus plane. Without tilt, the focus plane is of course parallel to your camera sensor. Strictly speaking, ‘tilt’ means leaning the top of the lens forward and back relative to the camera sensor. For left-right motions (rotation about the vertical axis) it’s called ‘swing’. This lens does both kinds of motions; tilt is forward/backward motion while the lens is at 0 degrees on the ‘rotate’ control. If you use the lens ‘rotate’ control +- 90 degrees combined with the ‘tilt’ control, then you accomplish ‘swing’. If you try to photograph a subject plane that isn’t parallel to your camera sensor, then some of it will be out of focus. You generally stop the lens aperture down to try to get more of the subject into focus. Landscape photographers fight this problem all the time, trying to get both near and far into focus. In the photo shown above, the lens has been rotated 90 degrees and then tilted down about 5 degrees. This configuration will tilt the plane of focus for a typical landscape shot to get both near and far subjects into focus. Lawn grass at f/1.4, no lens tilt. Focus peaking in red. In the shot above, the camera has focus-peaking active to show what’s in focus. The lens is set to f/1.4 without any tilt or rotation, and only a narrow band of the grass is in focus. Even at f/16, not all of the grass will be sharply focused. If the top of the lens could be tilted forward, relative to the camera sensor, then the plane of focus can be adjusted to match the plane of the lawn grass. In theory, all of the grass could be brought into sharp focus at even a very wide aperture like f/1.4. Grass at f/1.4, lens tilted 4 degrees and rotated 90 degrees Sure enough, the grass is able to get into focus by tilting the lens a mere 4 degrees. To get the correct tilt orientation, the lens also had to be rotated by 90 degrees. This lens has a full 360 degrees of rotation, with click stops at every 15 degrees. Some other designs for other camera mounts only rotate through 90 degrees. It works best to set/unset tilt while the rotation is at 0 degrees with the camera in landscape orientation. At 90 degrees rotation, the front part of the lens will free-fall down if you loosen the tilt control and not support the lens. Lens tilted 4 degrees, with rotation of 0 degrees. f/1.4 In the shot above, tilting the lens about 4 degrees got the entire plane of the wall into focus, even at f/1.4. Notice, however, that either side of the wall is out of focus. This is a slightly disturbing visual effect, in my opinion. Without any tilt control, only a very narrow band along the wall would have been in focus at this aperture. The shot is still somewhat lacking, however, and can be improved a bit more. Lens tilted 4 degrees, with rotation of 0 degrees. f/16 In the shot above, I stopped the lens down to f/16. Now, everything is focus. I didn’t notice any corner vignetting, even when the lens is tilted. This lens has a tilt range of +- 8 degrees. For most photography, only about +- 5 degrees is usually needed. There’s a detent at 0 tilt, so it’s easy to know that you got rid of any tilt. The ‘miniature model’ effect You can, of course, abuse the tilt/rotate controls and make crazy focus effects. A very common effect is to tilt in the opposite direction and force a distant shot to look like it’s a miniature model being viewed under a magnifying glass. People generally find this either charming or disturbing. The Scheimpflug principle to focus on a plane A French guy called Jules Carpentier filed a British 1901 patent, in which he spelled out the mathematics to get a tilted lens, a camera, and a subject to line up and make a sharp photo. Austrian army Captain Theodor Scheimpflug used this principle for aerial photography and made it famous. In the end, Scheimpflug got the credit, and it’s now called the Scheimpflug principle. Just get the subject, the camera sensor, and the lens tilt to intersect at a common point, as shown above. Lens Accessories Padded neoprene case with belt loop and hook I quite like the included lens case. It has a locking drawstring and protects the lens very well. I like using this case for my other smallish lenses. It’s much better than the flimsy pouches that Nikon makes. Metal slip-on lens cap The lens cap slips on easily, and shows no tendency to accidentally slip off. It fits over the lens 62mm filter threads. More lens specifications The metal lens weighs about 450 grams. The metal lens mount doesn’t have any weather sealing. There are 7 elements in 6 groups, with the rear pair of elements made of high-index glass. The lens image circle is much larger than normal lenses, so that lens tilts still keep the camera sensor fully covered. Bokeh 12 rounded aperture blades This lens has 12 rounded aperture blades. The large number of aperture blades, plus the rounding, makes for much better-looking backgrounds and lights that are out of focus. Those same rounded aperture blades mean that you won’t get extreme diffraction spikes coming off of lights. You can’t have it both ways. f/1.4 lights out of focus The out-of-focus lights shown above are fairly smooth, but their edges show some discoloration. Because I shot this photo wide open, you’ll note the “cat’s eye” effect on lights near to the edge of the frame. You can also see some of the effect of internal reflections. It’s up to you to decide if these effects are beautiful or ugly. I have definitely seen lenses do worse than the performance from this lens. f/1.4, no tilt It isn’t always about maximum sharpness. Dreamy background. Diffraction Spikes Diffraction spikes, f/16 Nothing to write home about. Some people call these sunstars. Lateral Chromatic Aberration Yes, you get purple corners. f/5.6 There is some purple in the corners with high-contrast subjects, but it honestly isn’t that bad. Even small branches are sharp edge-to-edge by f/5.6. Lens Resolution I have read very disparaging comments about this lens’ resolution. I did find that f/1.4 and f/2.0 look pretty weak, but f/2.8 and beyond are totally acceptable. Highest resolution is seen at f/5.6, while f/8.0 is probably the best overall performance. This is, of course, only one lens. I know nothing about quality control at their lens factory. I noticed that resolution is weaker as you focus nearer. My resolution testing was done at 2 meters, or about 7 feet away from my target. This distance would get roughly head-to-waist portraits in landscape orientation. MTF50 resolution measurements above roughly 30 lp/mm will be perceived as sharp. The best pro lenses might get some resolution readings in the 70’s. I provide the peak resolution measured (either meridional or sagittal) at each aperture. I also give the worst corner measurement I got at each aperture (the best of 4 measurements in each corner). If you didn’t know, “sagittal” measurements are in the same orientation as the spokes of a wheel. The “meridional” measurements are along tangents to a circle, which are then perpendicular to the sagittal orientation. Resolution measurements are a bit messy. They represent 2-dimensional information, and are also measured in 2 different orientations at each location. Web sites that give you just a single measurement for resolution are crap. Manufacturers that provide MTF contrast plots are almost always just theoretical; they aren’t made from actual measurements. Also, the theoretical measurements don’t take the camera sensor into account. The MTF contrast plots that I include below are from actual measurements, and they include the effects of the camera sensor, too. I use the MTFMapper program for the resolution measurements. This is the same software that NASA used to evaluate the lenses that are on the Mars rover Perseverance. Actual MTF contrast measurements, f/1.4 Lateral chromatic aberration f/1.4, microns My Nikon Z9 has 4.35 micron pixels, so worst case aberration is about 1.4 pixels. Corners of shots with small tree branches against the sky definitely look purple when you look real close. Actual MTF contrast measurements, f/5.6 Lateral chromatic aberration f/5.6, microns Minimum focus distance performance The shots below were taken at the minimum focus distance, which is 0.5 meters. You definitely need to use the viewfinder magnifier to get critical focus at this distance; at f/1.4 the depth of field is paper thin. I think that the eye looks reasonably sharp even at f/1.4, but you’d almost never achieve this with a live, moving subject at this distance. It’s a challenge that some photographers thrive on, however. I suppose you could ‘cheat’ and set the camera on high-speed continuous shooting and then throw away the 99% of the out-of-focus shots. Full frame of the subject at 0.5 meters. f/1.4 f/2.0 f/2.8 f/4.0 f/5.6 Resolution Summary This lens is indeed pretty weak at f/1.4 and f/2.0. It does sharpen up just fine by about f/4. You’ll need f/5.6 to get good corners. For the lens target audience shooting things like landscapes or product shots, they wouldn’t be using tilt features with the aperture wide open. When stopped down, the lens has plenty of sharpness. My old 50mm f/1.8 Nikkor (F-mount) beats this lens for sharpness, but it can’t do tilts (unless I were to drop it onto concrete). f/1.4 Sharpness isn’t always the primary criteria. Shots like this look just fine without super high resolution. Star shots Don’t. It has really bad coma. Summary I waited till the end to mention cost. This lens is really cheap; I didn’t want to influence people into thinking the lens has to perform badly, given how inexpensive it is. This is a physically very solid lens, which should easily tolerate moderate handling abuse (not including rain or dust storms). If you’re after sharp everywhere, then use the old photojournalist adage of “f/8 and be there”. If you like portraits with some character to them, don’t be afraid of f/1.4 (and pay attention to that background)! This lens is the opposite of mindless automation. You actually have to think about focus and taking advantage of unique perspectives via the focus plane tilt. The Scheimpflug principle definitely isn’t mindless. This lens makes me feel more like a photographer when I use it, since I have to be a more active participant. I’m forced to consider shooting subjects at angles with alternative planes of focus and I have to work a bit more at getting critical focus. I have found the experience ‘fun’, as opposed to ‘irritating’; others will invariably disagree with this perspective. The Z9 camera is flexible enough to go from the ultimate in automation to fully manual, and just about anything in-between; it compliments this lens very well. There are lots of optically superior 50mm f/1.4 lenses out there, especially in the corners. They cost a lot more, too. And they don’t have a tilt feature. This lens produces pictures that have a unique character, which you may or may not like. It’s all about choice.
- Nikon Z9: Using Screw-Drive AF or Manual Focus Lenses
It has been widely publicized that Nikon doesn’t support their screw-drive autofocus lenses on their mirrorless cameras. Does that mean you can’t use these lenses on cameras like the Z9? Absolutely not. Think about some of the higher-end lenses out there, such as the Nikkor 58mm f/0.95 S Noct lens. This baby is manual focus and costs $8,000.00! The Zeiss Otus 55mm f/1.4 manual focus lens for Nikon is $3,400. Are photographers ditching these lenses? Nope. The Nikon screw-drive lenses can be manually focused, exactly like those uber-expensive manual-focus lenses. The Nikon Z9 camera has focus aids that make manually-focusing this style of lens easier and more accurate than ever. For F-mount Nikkor lenses, all you’ll need is the cheap FTZ-ii adapter. You can also get adapters for lenses like the classic Canon 85mm f/1.2 that will allow their use on the Z9. A couple of lens adapter manufacturers are Viltrox and Fotasy. Since you get to view your subject at the shooting aperture (up through f/5.6) you get much better information about where and how deep the focus is. This is especially important for really bright lenses with wide apertures, which can tend to shift focus as you change the aperture. But wait, there’s more. You also get vibration reduction via the camera’s IBIS at no extra cost. Typical Nikkor Screw-Drive AF lens with FTZ-ii adapter on Z9 camera Lens with FTZ-ii adapter Simple, clean viewfinder with green square focus confirmation My generally preferred mode of operation with a screw-drive or manual-focus lens is shown above. I have a clean, unobstructed viewfinder configuration. The little square focus indicator turns from red to green when the subject under the focus point is accurately focused. I typically stay in aperture-priority mode and auto-ISO, so that I can concentrate on the subject composition instead of exposure. This little square focus indicator is amazingly accurate, and it only turns green when critical focus is achieved. You can move this focus square nearly anywhere in the field of view using the arrows on the camera multi-selector. The focus square gets a tiny dot in its middle when you place it into the screen center location. If I want extra information about the camera settings to show up on the display, then I press the DISP button on the back of the camera to select between none, some, or extensive shooting information. This configuration is great for static subjects, when you aren’t in a hurry to get the subject into critical focus. If you encounter a moving subject instead, then you’ll probably want to activate focus peaking to help you quickly observe and then adjust the zone of focus. There are magnifier "+" and "-" buttons on the back of the camera if you have a very static subject, and want to check focus by zooming in with the viewfinder. This can get tricky without using a tripod, especially with telephotos. i-Menu to access the focus-peaking menu I use the i-Menu to quickly access the focus-peaking features. Control focus peaking features Here is a full-featured menu to turn focus-peaking on/off, alter its sensitivity, and even change the color of the peaking highlight spreckles. A very busy display, including focus peaking enabled I will typically activate this busy display long enough to configure each of the appropriate camera shooting controls. Right after the configuration is set up, I then press the DISP button to get back to a cleaner display with less (or zero) shooting information. Subject is out of focus with focus indicator now colored red The shot above is out of focus. The focus-peaking spreckles have shifted away from the subject, and the little focus indicator square (screen center) has changed to a red color. Notice that there’s also a little white arrow at the bottom-left of the display that indicates which direction to twist the top of the lens focus ring to get the subject into focus. This little white arrow will turn into a white dot when sharp focus is achieved. Simpler display with subject in-focus The shot above shows a ‘clean’ display (!?). The subject is now in focus (focus indicator is green), but focus-peaking isn’t really appropriate for this subject. For some lens/subject combinations, focus-peaking is nearly impossible to use. Here’s a case where I would use the i-Menu to turn off focus peaking, and just use the little square focus indicator instead. Busy display with subject in-focus This picture shows how bad the viewfinder information overload can get. The subject is getting lost behind all of the indicators and focus peaking. And I'm not even showing the virtual horizon or histogram options! This is an example of what NOT to do. Summary The Nikon Z9 is crammed full of controls and indicators to give you as much or as little information as you want. You’ll need to spend some time to work with these controls and understand when they’re appropriate and when they’re not. It's especially important to get comfortable using the i-Menu and the DISP button to quickly configure the viewfinder to suit the subject matter and the lens. You'll thank yourself for the time spent learning these controls. Using manual focus or screw-drive lenses on the Z9 can be a rewarding or irritating experience, depending upon how you set up your camera. But you shouldn’t have any excuses not to get pictures in focus, when there are 4 different viewfinder features available to indicate correct focus.
- Color Infrared Techniques using Capture One Pro 22
Capture One Pro22 is the best editor that I have encountered for its ability to manipulate infrared photos. It has superior white-balancing capabilities and very advanced hue-shifting. I’ll attempt to show you how to take advantage of this power. You will need the “Pro” version to do these techniques. What I’m going to demonstrate isn’t very straightforward, but once Capture One is set up, it’s very easy to use on subsequent photographs. In my article, I’m starting with a camera that has been converted to pass 590nm infrared. This wavelength passes a little bit of visible (color) light, in addition to infrared. My camera sensor also has an anti-reflection coating (in the infrared region), which greatly expands the number of suitable lenses available. Cameras that don’t have this coating (or cameras just using an infrared lens filter instead) often have the dreaded hotspot in the middle of the picture, especially when the lens is stopped down beyond about f/5.6. My camera was IR-converted by Kolari Vision. If you are using long-wave infrared filtering, such as 850nm, then you won’t be able to perform these color hue-shifts. In that case, you should stick to black-and-white operations or a plug-in like Silver Efex. IR 590nm with separate sky/foliage hue shift White Balance Most cameras cannot be configured for correct infrared white balance, so it’s important that your photo editor has these capabilities. Most editors don’t have a sufficient color temperature range for infrared, but Capture One does. Before manipulating infrared colors, it’s important that you first get a good white balance in your pictures. The easiest way to get a good white balance is to start with a photo that contains either a white card or a neutral grey card that can be used by the editor to designate a neutral tone. You only need a single shot that represents typical lighting, where the colors in this photo can be used for other shots with similar lighting. If you don’t have a white or grey card, you can often use a subject such as a sidewalk or a patch of clean snow to supply a neutral tone in your photograph. Select the Eyedropper tool Infrared colors before white balance Infrared colors after clicking with WB eyedropper The photo now has a proper white balance after selecting a neutral color (such as the snow) with the eyedropper tool. Foliage typically will have a blue hue, and the sky has a “tobacco” color. Click this “Presets” icon to save the custom white balance After selecting the neutral spot in the photo with the eyedropper, click the “3 horizontal lines” (Presets) icon shown above to get to a white-balance menu. Select “Save Custom Preset…” Save your preset for use with other photos You should save this custom white balance for use with other photos later. For those other suitable photos with similar lighting, just click the same “Presets” icon and then select the named white balance. This is very handy for photos that don’t have any neutral subjects in them to select for a white balance. As you move the mouse pointer to different saved custom white balances in the menu, you can see the effect in the photo. For infrared white balance choices, you may want a photo taken in sunshine and another taken in shade. If you use different IR filters with various wavelengths, then you’d need to save white balances for each different filter, too. Remember to save those custom white balances with useful names. If you later change your mind, Capture One lets you delete any unwanted custom white balance presets. Adjust the sky hue Color infrared photos almost always need to have a blue sky (sunny day!). As shown in the “neutral” white balance shot above, the sky takes on a “tobacco” hue. On a color wheel, the tobacco color is about 180 degrees from a “blue” hue. It’s tricky to perform a 180-degree hue shift on the sky using Capture One Pro 22, but fortunately it only needs to be done once. Remember to perform a white balance on your shot before doing any hue shifts! Capture One Pro 22 lets you perform hue shifts of up to 30 degrees in one operation. To get a 180-degree shift, you need to do a series of 6 hue shifts of 30 degrees each. These operations are performed in the Advanced menu of the Color Editor. Click the eyedropper in Color Editor Advanced menu Note that the color wheel just above the eyedropper tool in the Advanced Color Editor starts as a small pie-shaped wedge. After selecting the sky in your photo with the eyedropper, note that this wedge encompasses the colors that make up the “tobacco” color. You’ll want to mouse-drag this pie-shape to be about 90 degrees and also extend it out to the edge of the circle. If you have much variation in color with your sky, you may need to extend this 90-degree pie-wedge suggestion to be larger, such as 120 degrees. Expand pie wedge range through 90 degrees Slide the hue slider out to 30 degrees, which is the maximum shift allowed. You’ll note a shift in the hue of your sky in the photo, but it’s still nowhere near the blue color you’re after. Repeat the operations of clicking the sky with the eyedropper tool, expanding the pie-shape to 90 degrees, and sliding the hue out to 30 degrees. You’ll typically need to do these operations a total of 6 times to get the 180-degree hue shift (30 * 6 = 180). You may want to alter the 180-degree shift to be slightly more or less, according to what you think is a proper blue color for the sky. Adjust the foliage hue Next, we’ll work on the foliage hue. Most people like the foliage color in infrared shots to look yellow-orange, but personally I like magenta on some shots. Note that yellow is about 180 degrees of a hue shift from the blue color of the white-balanced infrared shot. If you’re after yellow-orange-looking foliage then all you have to do is repeat the steps above (6 times again). The color picker should get pointed at the foliage, instead of the sky. If you would rather make the foliage look red or green or whatever, then simply adjust the hue shift to be more or less than 180 degrees total. Personally, I have made up several hue shift combinations, which include red, green, and yellow. Capture One lets you save your custom hue shifts with a name of your choosing! 3 Hue shifts of 30 degrees with color picker on foliage To save these split-hue adjustments, you use the “Presets” icon just to the right of the Color Editor heading. Saved the sky-blue, foliage-magenta hue shifts Pick foliage with 30-degree shift 6 times total for ‘yellow’ Select Custom Saved Split-Hue Shift You can now quickly select which hue-shift to try out on your other (white-balanced) infrared photos. Pick which hue shift to use To select a hue-shift, just click the “Presets” icon and then click on the desired preset. Your photo will show the hue-shift effect as you hover over each preset. Again, remember to white-balance your photo using your saved custom white balance preset before performing a hue shift. After selecting a pre-defined custom hue shift, you can still tweak the hue slider in your Advanced Color Editor to fine-tune the colors to suit the shot. Summary It is pretty tedious to perform all of the operations to accomplish split-hue shifts, but fortunately they only have to be done once. After saving these shifts, you can simply select them in the Color Editor “Presets”. I typically convert my infrared shots into black-and-white, but once in a while it’s fun to see what color can do. Another world I tweaked other settings to adjust saturation, vignetting, highlights, shadows, and clarity to add a bit of drama.
- Batch Processing: Lightroom and Topaz DeNoise AI
The newer image editing software that features use of artificial intelligence is both a blessing and a curse. It can enhance images in amazing ways, but it can require massive computer processing resources and can also be painful to endure the wait times it requires. My favorite example of this kind of software is Topaz Denoise AI. The sophistication in its image sharpening and noise removal seems almost magical, but I dread how long it takes to perform its miracles. The future promises to offer more and more programs that operate using artificial intelligence, demanding ever more computing resources. Even when you buy that new computer with a better GPU, there’s still a significant time penalty to pay for using AI. A good way to cope with this reality is to turn to ‘batch’ processing. You’ll want to save the AI processing steps (e.g. sharpening and noise reduction) until the last stage of your image processing, so that you can go get some coffee or sleep while the computer finishes processing your photos. It just so happens that saving noise removal and sharpening to the very last steps in image processing is nearly always the best technique, anyway. If you edit all of your images with the exception of sharpening and noise reduction, then you can send all of these images into programs like Topaz Denoise AI in a large group, to be processed in one batch. You can even customize the sharpening/noise reduction algorithm per photo before executing the batch processing! My most commonly-used image editor is Lightroom, so I’m going to show you how to batch-process images using this program. Lightroom with Topaz Denoise AI First, complete your usual image edits, but skip performing any sharpening or noise reduction for each image. Please shoot in Raw format! Go to the Library tab. Pick which photos to send to Topaz Select each DNG/RAW image that you want to process with Topaz. Use the CNTL and SHIFT keys while mouse-clicking to select multiples. In the example above, 3 shots are selected to batch-process. Photo | Edit In | Edit in Topaz Denoise.exe Retain all of your adjustments You will want to sharpen and rid noise from the photos that contain the edits you performed in Lightroom. The Topaz Denoise AI program will process and then create new photos in the selected file format as shown above. Inside Topaz: select all of the photos, and then start processing I have DeNoise AI set up to use my favorite AI ‘Clear’ recipe for my shots, which it will apply to each photo. Topaz will by default apply the last-used algorithm for each shot. Select custom processing for each shot The Topaz DeNoise AI is actually so sophisticated that you can click on each shot in the list and customize which AI algorithm you want to use on it. As you click on a filename at the screen bottom, you can preview the effect and decide which algorithm to use. When each shot has the custom algorithm assigned, finally click on “Select All” to begin the batch process. Topaz Denoise AI progress display Your Lightroom library will contain the new files and you’ll be automatically returned to Lightroom after all of the photos have been processed in Topaz Denoise AI. In the sample shown above, the new (sharpened) photos will be in TIFF format. Now go get that cup of coffee. If you have many photos to process, this may take a while. Some of the AI algorithms can take much longer to process a shot than others do, but if you’re away from your computer this can become a “don’t care”. Back in Lightroom after batch processing finishes Back in Lightroom, the new (sharpened) files are highlighted/selected in the Library module, as shown above. If you wish, you can export these photos right from the Library module. Typically, you’d export these sharpened photos as something like jpeg format. If you leave them all selected as shown above, then the files can also be exported as a batch process. Batch Processing in DeNoise AI from the Desktop In Windows, you can batch-process photos in DeNoise AI by itself, too. If you use an editor that doesn’t play nicely with Topaz, then this is how you can still finish sharpening and noise removal as a batch process. Here’s one way to do that: First, export the files you want to later edit in Topaz from Lightroom (or whatever editor you use). Do this step to capture all of the edits (without sharpening or noise removal). From the Library tab, multi-select the files to export. File | Export… I’d suggest you export the files in a high-quality format, such as TIFF. The screen shot above shows using DNG output, which Topaz understands, but there’s a problem with that format I’ll discuss later. From Windows File Explorer, select photos that have been edited and exported (so that the edits are embedded in the files). You can use the Shift or Cntl keys with the left mouse button to refine your selections. Now, just drag the photos to the Desktop “Topaz DeNoise AI” icon. The DeNoise AI program will automatically start running. In DeNoise AI, click ‘Select All’, then ‘Save’ Like I mentioned earlier, you can also click on each photo filename and customize which AI algorithm to use, with the ability to preview what the selected algorithm will do. After you’re ready, click the “Select All” just above the filename list. Confirm how to save images Progress update while Topaz is processing When the batch processing is finished, you can just quit the program. If you selected “Preserve Source Directory” for the batch output, then the results will be saved in the same folder as your original photos. I’d recommend that you NOT use DNG files in the Topaz software, but use TIFF instead. The Denoise AI program appears to “undo” the edits when using that format. If you stick with TIFF instead, the edits done via Lightroom (or whatever editor you use) get retained. Summary If you have lots of photos that you want to edit and then sharpen, batch processing is the way to go. If you haven’t done it yet, you will probably need to get a computer with a really good GPU to handle the extreme resources that AI-based programs like DeNoise AI need. Otherwise, you might be faced with drinking more than a couple cups of coffee waiting for the processing to finish.
- Nikon Z9: Un-retire Your Lenses
I have a few Nikkor “F-mount” lenses that I recently started using again. Why did I stop using them in the first place? In a word: focus. The Nikon Z9 has the best focus capabilities of any camera I have ever tried, and it is now giving new life to lenses that have frustrated me since I first got them. Nikon Z9 and Nikkor 85mm f/1.4 AF-S The first lens I un-retired is my Nikkor 85mm f/1.4 AF-S. I had virtually stopped using this lens because of an optical effect called spherical aberration. For many (most?) high-speed lenses, they will shift focus when you change the lens aperture. You can only focus-calibrate a lens at a single aperture setting, which isn’t a problem for most lenses, but it sure is for this 85mm. Every aperture change, up through about f/5.6, would shift the focus and generally ruin the shot. I calibrated my lens at f/1.4, but every shot at a different aperture would be soft. Very irritating. DSLRs focus with the lens aperture wide-open, and then stop the lens down an instant before taking the shot. Therein lies the problem: automatically shifting the focus before taking the shot. The Z9 will focus at the requested aperture (through f/5.6), and totally avoid the problem of spherical aberration. It’s of course possible to always shoot a DSLR using contrast-detect at the requested aperture, as long as you don’t mind super slow focus and trying to see the rear screen out in the sunshine. I happen to mind. Also, DSLRs aren’t as good at accurate contrast-detect focusing as you might think. All of my DSLRs operate on the principle of “good enough” for focus. After they get within a small tolerance of correct focus, they simply stop. This is especially true of phase-detect focus. Most users are happy with the focus results, but my resolution-measuring software shows just how loose and variable this good-enough approach is. I can rarely get peak resolution readings by using either phase-detect or contrast-detect focus on a DSLR; I have to manually shift focus by small amounts to get the highest resolution results (one out of a ton of shots), or else pick the best results out of a bunch of auto-focus attempts. I have tried experiments with my Nikon Z9, and have found that the resolution-measurements are typically repeatable within an MTF50 contrast variation of 1 or 2 lp/mm! This is just extraordinary. There’s one more reason that I have started using my 85mm f/1.4 lens again: it now has vibration reduction. The Nikon Z9 includes in-body image stabilization (IBIS), so now the 85mm (that has no VR) can suddenly take advantage of stabilization! Just wonderful. Z9 with Nikkor 24-70 f/2.8 VR Another ‘F’ lens that has been taken out of semi-retirement is my 24-70 f/2.8 VR. This lens is notorious for shifting focus as you zoom it. I would focus-calibrate it at 70mm, and find that 24mm (and most other focal lengths) was terrible when shot wide-open. No matter which focal length I would choose for focus-calibration, the other focal lengths were always soft. My Sigma lenses can be calibrated at multiple focal lengths to solve issues like this, but not Nikon lenses. The Nikon Z9 with its super high-speed Expeed 7 processor just nails focus. Zooming no longer has an impact on focus calibration. As a matter of fact, the Nikon Z9 needs NO focus calibration with any of my lenses, even though it still offers a focus-calibration feature. You have to use the FTZ-ii adapter with these lenses, of course, but focus speed isn’t impacted at all. The increase in weight is trivial, and I honestly don’t even notice the adapter while I’m shooting. I have a friend that has un-retired his F-mount Nikkor 70-200 f/2.8 lens since he got his Z9. That lens also suffered from severe focus shift while zooming, which drove him crazy. He reports that it now works perfectly on his Z9. Now he’s considering retiring his D850 and D500 cameras and getting a second Z9. I already wrote some articles (for example) on lenses with different mounts that can be adapted to the ‘Z’ mount. These are manual-focus lenses, but the great focus-peaking found on the Z9 has now given these lenses new life (including vibration reduction), as well. I don’t feel any pressure to get Z-mount lenses, since my F-mount lenses perform better than they ever have. My Z9 has nearly paid for itself by letting me use lenses that had been largely abandoned. It’s just a bummer that my screw-drive auto-focus lenses won’t work on the Z9.
- Nikon Z9 Pre-Release Capture Shooting Guide
Have you ever been frustrated by being unable to get that peak-action shot, even when you thought you were “ready” for it? Some subjects simply go way beyond human reaction time. Nikon has solved this problem with their Z9 camera: pre-release shooting. What exactly is pre-release capture shooting? This means capturing photos before you press the shutter. You can configure the Z9 to start taking photos while you half-press the shutter release and then save up to 1 second of these photos when you fully press the shutter, along with all of the shots you take while you keep pressing the shutter release. While you half-press the shutter, the shots that are being saved up in the camera buffer are simply thrown out once they are over one second old. Actually, you can configure this pre-release buffer to range from 1 second down to 0.3 seconds. You can also configure how long to take shots after you press the shutter fully, from 1 second up to about 4 seconds. You can take these shots from 30 frames per second up to 120 frames per second. The ‘gotcha’ here is that you can only shoot in jpeg shooting mode, and not raw mode. Maybe a future firmware release will allow raw shooting… This feature became available with firmware version 2.0. Note that the camera can continuously auto-focus and update the exposure while this form of shooting happens! Amazing processor speed. Capture the exact peak of action with ease Configure the Camera The pre-release capture feature has one of the most complicated setups on the Z9. I’ll try to distill down what controls you need to set and what you need to look for. Configure the camera buffer In the Custom Settings menu, select the d4 continuous shooting pre- and post-release buffer size. This is how long to save the shots before and after pressing the shutter button. You can specify from 0.3 to 1.0 seconds of shots to save while half-pressing the shutter button. You can also specify from 1 second to ‘Max’ (about 4 seconds) to save after pressing the shutter release. Select a picture quality from the jpeg options Unfortunately, you have to switch to a jpeg-only mode for shooting. The shot above shows my i-button screen, where I select the picture quality. Pick a jpeg quality. No Raw allowed! Spin the dial to the continuous ‘Quick Release’ setting Press the Release Mode to select either 30 or 120 fps Select either 30 fps or 120 fps Half-press the shutter release You’re now ready to start taking photos. Next, you’ll need to half-press the shutter to start continuously-filling the camera pre-release buffer with pictures. Nothing is permanently saved until the shutter is fully pressed down. You should now start tracking your subject and focusing the lens. After you note that the subject action you were waiting for has already come and gone, fully-press down the shutter release. The camera will now save the shots in its ‘pre-release’ buffer and also the shots after you pressed the shutter all the way down. Be prepared to delete a whole bunch of shots. Getting “the shot” means you’ll have a ton of off-peak action shots to get rid of, or else you’ll soon end up filling up your memory card. Summary Pre-release capture is one of the nicest new Nikon Z9 features. It’s a bit unfortunate that setting it up is so complicated. You now finally have a chance to record that baseball when it smashes against the bat, or the grass hopper as it leaps into the air.