Search Results
228 items found for ""
- Minolta Rokkor-QF 50mm f/3.5 Macro on the Nikon Z9
Here’s another lens that got as much respect as Rodney Dangerfield. I got a cheap Fotasy MD-N/Z adapter to put old manual-focus Minolta lenses on my Nikon Z9, including this 50mm macro. The quality results have been very surprising using old Minolta lenses; some good and some bad. This Rokkor 50mm macro lens falls into the “good” category. Actually, my lens copy beats the legendary Nikkor 55mm pre-AI Micro Nikkor that was used in the original Star Wars film. If you occasionally explore macro photography, where auto-focus is rarely even needed, it can be a smart financial move to get some old manual gear. This Minolta stuff is really cheap, and the photographic results can border on stunning. The Nikon Z mount has made mixing and matching lenses very easy to explore. The very short flange distance and large mount diameter makes it possible to mount most anything onto the Nikon mirrorless cameras. My Fotasy adapter lets me explore old Rokkor MD and MC lenses, where I still get infinity-focus capabilities. This adapter has no electrical contacts, but that’s no problem on Nikons with non-CPU lens capability, which still permits auto-exposure in aperture-priority mode. For non-macro photography, this Nikon Z9 lets me have IBIS (vibration reduction), aperture-priority, auto-exposure, and focus-peaking with any manual focus, non-CPU lens. It’s much easier to focus these old lenses using focus-peaking than it ever was with split-image or micro-prism screens in the film era. Here’s a link to various settings for getting the most out of any fully-manual lens used on a Z-mount. This 50mm lens has 5 aperture blades, 6 elements (4 groups), and the “MC” in its name means it is meter-coupled. It stops down to f/22. It has a red “R” on its focus scale for a typical infrared photography focus-shift. This pure metal-and-glass lens weighs 330 grams. It is built with very high quality, and it still has perfectly smooth focus action. It was made in 1967, but I’ll bet that photos taken with this lens could easily be mistaken for a totally modern lens. Since these old lenses don’t have electronics in them, they generally last a very long time if they’re not mistreated (e.g. used in the rain). Since this 50mm Macro only focuses down to ½ life size, Minolta also made a set of extension tubes (EB, No.1, No.2, No.3, and EL) to get down to life-size. These tubes are also dirt-cheap to buy used. If you like more extreme magnification photography, you can also combine bellows units, like my Nikon PB-4, with this old Minolta lens, too. Image quality is improved if you reverse-mount lenses when going beyond life-size magnification, so I also have a Nikon BR-2 ring for that purpose. This 50mm Rokkor has a 55mm filter thread, so I also need a 55-to-52 mm step-down ring to attach it to the BR-2 ring. As usual, you’ll need an FTZii adapter to connect the Z-mount camera onto F-mount equipment, such as this PB-4 bellows unit. MC Macro Rokkor-QF f/3.5 50mm on Nikon Z9 Fotasy adapter to mount the Rokkor onto the Nikon Z9 Low-magnification shot Magnification: white = lens alone, orange = extension tubes Macro range, lens alone Reverse-mounted lens on Nikon PB-4 bellows Note that a wired remote is attached to the camera 10-pin connector for taking the shots without any vibration. The “EL” and “No.3” Minolta extension tube is mounted on the lens to protect it and to act as a lens shade. The extension tube of course limits subject lighting options and also working distance; it isn’t mandatory. You can also swap the No.1 or No.2 tubes for better working distance and easier lighting setups, with a little less protection. You might not even think of using a non-Nikon lens on this PB-4 bellows, but the Nikon BR-2 ring, step-down rings, and adapters like the Fotasy MD-N/Z open up a whole new world of possibilities. Reverse-mounted lens on PB-4 bellows The high-magnification shot above couldn’t have been done without using the bellows. The whole bellows rig was shifted along its rail to get a series of overlapping shots, which were then focus-stacked using the Helicon Focus program. The focus-peaking camera feature makes it pretty easy to observe how the focus shifts shot-to-shot as the camera is shifted along the bellows rail. You can even see some of the facets on the bee’s eye. To me, this looks like first-rate optics in action. Extreme magnification at maximum bellows extension Focus-stacking was used here, too. Each individual shot in the stack has paper-thin depth of focus. These results look sharp, sharp, sharp. Extra pieces of gear to mount the lens in reverse for best quality Using the Fotasy adapter to protect and shade the lens In the shot above, I substituted the Fotasy adapter to be used as a lens shade and protector (this is optional). Note that the FTZ-ii adapter is required to connect the camera to the PB-4 bellows. The Nikon Z9 must be rotated to vertical-format shooting if you want to slide it along the PB-4 rail, because its vertical grip makes the camera a bit too tall. Lens Measurements I used the MTFMapper program to analyze shots from the Nikon Z9, taken in raw HighEfficiency format, converted to DNG format. I used the free Adobe DNG converter program to convert the HE shots (1/3 the size of regular compressed raw) into DNG. As of this date, none of my photo editors understand the HE format, but most of them understand the DNG format. The Zoner Photo Studio automatically invokes the conversion into DNG, so at least that editor works seamlessly with the HE format. The full resolution target The chart above is what I used to get the resolution, contrast, and lateral chromatic aberration measurements. The target is 40 inches tall by 55 inches wide. The chart also works well to get a visual evaluation of vignetting. I don’t have a chart that is small enough to directly measure the optics performance in the macro range. 50mm f/3.5 Resolution Resolution across the whole frame, with a peak of 50.9 lp/mm wide-open. I wouldn’t recommend this aperture, although the center resolution is entirely acceptable. Resolution numbers and vignetting sample, 50mm f/3.5 The shot above shows some sample resolution measurements overlaid onto the resolution chart photo. This also demonstrates the worst-case (f/3.5) vignetting. Nearly any photo editor can easily rid this vignetting, if you don’t want it. 50mm f/5.6 Resolution Stopping down to f/5.6 gets a peak resolution of 64.2 lp/mm. The edge-to-edge resolution is just now getting acceptable, while the center nears maximum resolution. Resolution numbers and vignetting sample, 50mm f/5.6 Stopping down one stop helps vignetting, too. 50mm f/8.0 Resolution Stopping down to f/8.0 smoothes the across-frame resolution, with a peak of 58.1 lp/mm. Resolution numbers and vignetting sample, 50mm f/8.0 50mm f/11.0 Resolution Stopping down to f/11.0 reaches this lens’ smoothest performance; going to 54.7 lp/mm. Image quality here is just excellent across the frame. Resolution numbers and vignetting sample, 50mm f/11.0 Summary The price-to-performance ratio here is excellent. As an overall lens line, I still give the edge to my old Nikkors, but photos made with this Rokkor 50mm macro lens can look excellent. A camera like the Nikon Z9 makes shooting with a manual lens like this easier than it has ever been, especially at extreme magnifications. An adapter like the Fotasy MD-N/Z makes exploring the old Rokkors almost financially risk-free. If you only shoot close up once in a while, then you can’t go wrong with a lens like this.
- Using the Minolta Rokkor-PF 135mm f/2.8 on a Nikon Z9
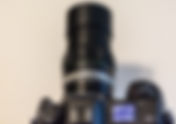
What’s a more insane combination than an old Minolta manual focus Rokkor lens on the Nikon Z9? I can’t off-hand think of anything, so of course I had to try it. I got a Fotasy MD-N/Z adapter that set me back a whopping $16 to try this combination out ;~). This adapter will let you mount MC or MD Rokkor lenses on a Nikon Z-mount. The Fotasy adapter has no electronics or optics; it’s basically a metal tube. I have had some Minolta gear literally sitting on a shelf as knickknacks for several years. This stuff is there as a reminder of old adventures I had with it, before I switched to mainly Nikon gear. I never thought I’d shoot any more pictures with these lenses, since the death of the film era. Did you know that Sony bought Minolta, and their original interchangeable lens cameras had Minolta (auto-focus) optics on them? Most people thought of Minolta lenses as second-best to Nikon, back in the day. You might think otherwise by the end of this article. Yes, Minolta made some lenses that were really second-rate, but there were also some gems. Nikon just had to turn things upside down by inventing a ‘Z’ lens mount that will allow you to mount most anything on it, thanks to its large diameter and short flange distance. You just need to configure the “Non-CPU lens data” in their Setup menu to let the Z9 know what’s mounted on it. Here’s a link to various settings for getting the most out of any fully-manual lens used on a Z-mount. Note that the camera EXIF data will record the lens focal length, the ISO and shutter speed, but the aperture will always be recorded as the same maximum aperture that you configured in the non-CPU lens setting. I did a quick internet search and found a few adapters that let you mount the Minolta Rokkor MD or MC lenses onto a Nikon Z mount. They all allow infinity focus using the Minolta lenses. Needless to say, I couldn’t resist the temptation to try one of these adapters out. Keep in mind, this Nikon Z9 lets me have IBIS (vibration reduction), aperture-priority, auto-exposure, and focus-peaking with any manual focus, non-CPU lens. It’s much easier to focus these old lenses using focus-peaking than it ever was with split-image or micro-prism screens in the film era. MC Tele Rokkor-PF 135mm f/2.8 on Nikon Z9 I bought a used 135mm f/2.8 lens, which was manufactured around 1970. It has 6 elements in 5 groups, and has a minimum focus distance of 5 feet (I wish it focused nearer). It has the slip-out built-in lens shade, which I have always preferred. It has 55mm filter threads. The “MC” stands for “meter-coupled”. I wanted a ‘portrait’ lens that gives the subject a bit more breathing room, leading to pictures where the person looks more at ease. This is an all-metal-exterior 135mm lens, and the optics have truly good bokeh. The focus ring rotates as smoothly as it did when it first came out of the factory. It only weighs 490 grams, which is surprising for an all-metal lens. I “baby” my lenses; they don’t go out in the rain or get covered with sand or mud. I seriously doubt that these old Rokkors have any weather sealing, but if you treat them well, they should return the favor and treat you well, too. Since they don’t have any electronics in them, their lifetimes are almost guaranteed to far exceed lenses with focus motors and vibration reduction. Just don’t drop it. Worst-case vignetting at f/2.8 Note how sharp the photo is edge-to-edge, even though the lens was used wide-open. If the vignetting looks excessive to you, it’s simple to fix it in an editor. I can see only slight lateral chromatic aberration, and I haven’t seen any distortion at all. Frame edge detail from the shot above Details like what’s shown above will readily show the dreaded purple fringes, if the lens has any tendencies to have lateral chromatic aberration. I don’t see any here at all. When I use focus peaking and point the lens at flat lawn grass or textured carpeting, it’s easy to see if there is any field curvature. I don’t see any of that, either; the focus-peak speckles that I see are all parallel to the frame horizontal edge. Lights at f/2.8 on the edge of the frame If I hadn’t said anything about this lens’ origin, I doubt that anybody would guess that this photo wasn’t shot with a modern lens. Very, very nice bokeh. Focus-peaking makes manual focus easy and accurate You can see the little red edges around the parts that are in focus. It’s of course easier to use this same focus-peaking feature while looking through the viewfinder. 135mm f/2.8 Lens Measurements I used the MTFMapper program to analyze shots from the Nikon Z9, taken in raw HighEfficiency format, converted to DNG format. I used the free Adobe DNG converter program to convert the HE shots (1/3 the size of regular compressed raw) into DNG. As of this date, none of my photo editors understand the HE format, but most of them understand the DNG format. The Zoner Photo Studio automatically invokes the conversion into DNG, so at least that editor works seamlessly with the HE format. The full resolution target The chart above is what I used to get the resolution, contrast, and lateral chromatic aberration measurements. The target is 40 inches tall by 55 inches wide. The chart also works well to get a visual evaluation of vignetting. 135mm f/2.8 Resolution Notice how even the resolution is across the whole frame, with a peak of 40.9 lp/mm wide-open. This is plenty of resolution, even without stopping down. Lots of modern lenses aren’t this good. Resolution numbers and vignetting sample, 135mm f/2.8 The shot above shows some sample resolution measurements overlaid onto the resolution chart photo. This also demonstrates the worst-case (f/2.8) vignetting. Nearly any photo editor can easily rid this vignetting, if you don’t want it. MTF Contrast actual measurements, 135mm f/2.8 Notice how little astigmatism this lens has. Impressive. I always have to mention that most companies only publish 'theoretical' MTF contrast curves. My software produces these curves from actual measurements. Lateral chromatic aberration, microns Probably the weakest aspect of this lens is its lateral chromatic aberration. Fortunately, photo editors can (mostly) take care of this. When this lens was manufactured, your slides were stuck with this color fringing. 135mm f/4.0 Resolution Stopping down one stop to f/4.0 gets a peak resolution of 44.5 lp/mm. Resolution numbers and vignetting sample, 135mm f/4.0 Stopping down one stop really decreases vignetting. 135mm f/5.6 Resolution Stopping down to f/5.6 gets a real jump in peak resolution, going to 50.4 lp/mm. Resolution numbers and vignetting sample, 135mm f/5.6 135mm f/8.0 Resolution Stopping down to f/8.0 reaches this lens’ highest resolution, going to 54.0 lp/mm. Image quality here is just excellent. Stopping down further starts reducing resolution. The lens goes to f/22, but I'd recommend you don't go beyond f/16. Resolution numbers and vignetting sample, 135mm f/8.0 Summary I always liked this lens’ image quality, but only shooting with film never let the lens really show what it was capable of. Minolta (mostly) made better gear than people realized, and they had to design old lenses like this without the benefit of computers. I can’t guarantee that this lens is representative of others using this design, but hopefully it will give you some idea of what kind of images these lenses are capable of producing. As a public service, I should mention that you should avoid their MD Tele Rokkor-X 300mm f/4.5 lens; I wish someone had warned me before I bought one many years ago. If there’s a focal length that you know will only get used occasionally, a lens like this can be found for dirt cheap. Why on earth should a gem like this end up in the landfill? It’s very liberating to know that you’re not constrained to just Nikon lenses when you are using a Z-mount camera. There will probably be many different third-party lens adapters that become available in the future.
- Nikon Z9 AutoFocus Area Mode Speed Measurements
The Nikon Z9 has quickly gained a reputation for its focusing prowess. This reputation centers around its ‘stickiness’ and accuracy. I couldn’t find any useful data about how its various focus area modes compare for actual focusing speed. I wanted to find out if there were any significant focus speed advantages or disadvantages when changing focus-area modes. I’m using the firmware version 2.1 and testing with the Nikkor 500mm PF f/5.6 lens. This is of course an F-mount lens, so I’m using the FTZ-II adapter. Nikon Z9 with 500mm f/5.6 PF I have assigned 4 different focus-area modes to 4 different buttons, since I found out on the first day of Z9 shooting that one mode definitely won’t suffice. I always leave my focus on AF-C. My camera is set to “automatic subject detection”, which I think means that it will first try ‘people’, then switch to ‘animal’, and finally switch to ‘vehicle’. My testing involves setting the lens on minimum focus and then having the camera focus on a target (a high-contrast distant tree) at ‘infinity’. For all tests, the same sunny conditions were used, as well as the same high-contrast distant target. In real life, you’d almost never have your lens at minimum focus distance and then focus on infinity; realistic focus times will be much faster than what my test numbers indicate. I used 120 fps slow-motion video to record the 500mm lens focus scale during the test. To time the focus, all I have to do is count the frames to go from the start of focus scale motion to the end of motion. Each frame is 1/120 or 0.0083 seconds. As an added benefit, the video will clearly record if there are any hiccups or stutters while focusing. This stuff can happen faster than your eye can track. For comparison to the Z9 camera, my Nikon D500 focus speed with this 500mm lens is typically 0.308 seconds. The D500 focus system is supposed to be the same as the D5 model, and it seems to be just a hair faster than the D850 focus system. 3D-Tracking Mode This is my favorite focus-tracking mode. In most situations, the focus box will really stick to the selected subject, no matter how it moves around the frame. It works for more than just eyes. I assigned this mode to the AF-ON button (I never use the shutter button to focus). Focus typically took 41 frames, or 0.342 seconds. A couple of times, I got 39 frames, or 0.325 seconds. This is about 5 to 10% slower than the D500. In actual practice, you should consider this contest to be a tie with the D500; you’d never notice the difference. Wide-Area Large I assigned this mode to my fn1 button. For stuff with eyes, this mode works well most of the time. Sometimes this mode totally outperforms 3D-tracking, and often it’s unpredictable when those occasions are going to be. Focus took 42 frames, or 0.350 seconds. A bit slower, but not really enough to perceive the difference. Dynamic-Area Medium This is a ‘dumb’ mode, used for when the camera insists on tracking the wrong thing with the fancy AI modes. This is also the primary mode I’d be using with my D500 camera. I assign this to my fn2 button. Focus took 41 frames, or 0.342 seconds. Single-Point Use this when you need precision, and the subject isn’t moving. I assign this to my fn3 button. This is another “dumb” mode with no AI behind it. Focus took 40 frames, or 0.333 seconds. This seems to be the fastest mode, but not enough to tell the difference from the others. Conclusion I didn’t see any focus-stutter in any of the modes. If I switched to low-contrast targets, I could get any of the modes to focus-stutter a bit, although nothing that you could notice with the naked eye until really dim conditions. It appears that you needn’t worry about which focus mode you select causing a slowdown. The Z9 is really fast at focus speed, period. It was quite unexpected, however to see that my D500 had a slight edge at raw focus speed, although it’s no competition with the Z9 when it comes to either focus precision or ‘stickiness’ at subject tracking. Don’t worry about the F-mount lenses being slow to focus, compared to the pro-level DSLRs. I seriously doubt that you could notice any difference. I bet you will notice a difference in focus precision, compared to DSLRs; the Z9 just nails focus wherever the focus sensor is aimed.
- The Nikon Z9 with Teleconverters: No Focus Speed Penalty?
I had to perform this test comparison several times, because I could hardly believe my eyes. The Nikon Z9 focuses some lenses just as quickly with my teleconverter attached as it does without! I am using my Sigma TC-1401 1.4X teleconverter with both my Nikkor 500mm f/5.6 PF and my Sigma 70-200 f/2.8 Sport lens. Nikon Z9 with the Sigma TC-1401 1.4X teleconverter The shot above shows the Z9 with both the FTZ-II and Sigma 1.4X teleconverter attached to my 500mm f/5.6 PF lens. This is one of the combinations I used to measure focus speed. With the DSLRs that I have tried, attaching this teleconverter will slow down focus speed by about 25%. The 1-stop lesser light level always gives you a speed penalty, in addition to the resolution drop. I used 120 fps video to record the focus scale motion on my lenses in bright light. I just have to count the frames that show the focus scale motion to measure the focus speed. When I did this test to see how much my teleconverter would slow down the focus time on my 500mm PF, I found no difference when using the Nikon Z9! How can this be? The Nikon Z9 shoots with the requested lens aperture, down through f/5.6. It never opens up the aperture while shooting. Any DSLR will focus with the lens at its widest aperture, and then quickly stop down the aperture to take the shot. DSLRs need all the light they can get to focus quickly. The Nikon Z9 can focus in dim light, and it doesn’t need the lens aperture to be wide open. The 500mm Test Without using a teleconverter, I focused the 500mm PF with the Z9 in sunlight. I started with the lens on minimum focus distance, and focused on a distant tree using the “3D-Tracking” focus mode. I recorded the focus scale using video at 120 fps. I counted 41 frames that showed focus scale motion, or 0.342 seconds. I repeated the test (several times!) with the Sigma 1.4X teleconverter attached, and again recorded typically 41 frames of focus activity going from minimuim focus to infinity (0.342 seconds). No change in focus speed when I include the teleconverter! When I did focus speed tests using my D500 DSLR and this same lens, it could focus in 0.308 seconds without using the teleconverter, but it took 0.400 seconds when I attached the teleconverter. The Sigma 70-200mm f/2.8 Sport Test Still using 3D-tracking for focus, my testing found the following: No teleconverter at 200mm, f/4: 49 frames, or 0.408 seconds. With teleconverter 280mm, f/4: 53 frames, or 0.442 seconds. I also tried wide open at f/2.8, 200mm with no measured focus speed change. In all of my tests, I went from minimum focus (about 4 feet) to infinity. This is a much longer range than the 500mm PF lens, which I think accounts for the longer focus time. Similar to the 500mm results, my D500 was faster-focusing than the Z9 without the teleconverter (0.36 seconds) but slower than the Z9 with the teleconverter (0.45 seconds). Again, you couldn’t perceive this slight difference with the naked eye. This is only about an 8% slowdown using the Z9, compared to a 25% slowdown on my D500 camera. This speed change can’t be noticed in use; there’s essentially no focus-speed penalty here, either! Other Benefits I also noticed that my Z9 really reduced focus-hunting when using the 500mm/TC combination in dim lighting, compared to either the Nikon D850 or D500 cameras. Focus of course gets slower in really dim light with the Z9, but it retains fantastic focus precision. Due to the extra focus accuracy and repeatability, my shots are nearly always a tiny bit sharper when using the Z9/TC combination compared to my DSLRs. I haven’t even had to perform any focus fine-tune calibration with the Z9. Expect similar results to the Sigma TC-1401 when using the Nikon teleconverters. I think that the Z9 is just showing off. I had held off for a long time getting a mirrorless camera. I wanted nothing to do with short battery life, poor viewfinder frame refresh rates, low viewfinder resolution, substandard low-light performance, and slow focus. Those days thankfully are now over.
- Shooting a Pre-AI Nikkor 105mm f/2.5 with the Nikon Z9
With all the discussion about dumping your F-mount lenses for Z lenses, here’s something completely different. How about using Nikon’s oldest lenses? It may not have been their intention, but Nikon has made using manual–focus lenses better than it has ever been. I fell in love with shooting Nikon gear after my first outing with the Nikkor-P C 105mm f/2.5 portrait lens years ago. This is the lens that really established Nikon’s reputation. It was invented before auto-indexing, auto-focus, auto-exposure, virtual horizons, histograms, and vibration reduction. With no electronics to fail, it works just as well as the day it was made (around 1973). The next-generation version of this lens (Ai-S version) was used by National Geographic photographer Steve McCurry to take the “Afgan Girl” photo, using the Nikon FM2 in 1984. Her name is Sharbat Gula. But I digress. Through the years I have held onto this lens, even though the newer generations of digital cameras made the lens unusable and obsolete. Nikon, perhaps unintentionally, did something special for this old lens. They made the Z9 and the FTZII adapter. I now have a system that offers aperture priority, auto exposure, focus-peaking, and even vibration reduction for my old 105mm. I can hardly believe it. These same capabilities, of course, also apply to the newest Zeiss Otus manual-focus lenses. Most photographers probably think that this lens/camera combination is totally insane and, by extension, so am I. There’s just something about this lens that I will always treasure. The feel of the focus action is just perfect, and the optics can still deliver. If people can still buy LP’s and enjoy listening to them, then I should be able to shoot with old classic glass and enjoy that, too. If you’re interested, here’s a link to my original article on the 105mm f/2.5 Nikkor-P C. Z9 and FTZII with 105mm f/2.5 pre-AI lens and hood Tell the Z9 about your pre-AI lens The first step in using this lens is to give the Z9 camera a clue about what is attached. This is done through the Setup Menu Non-CPU lens data option. You’ll need to do this for any lens that doesn’t have a CPU in it, and not just pre-Ai lenses. It shouldn’t need mentioning, but please remember to attach the FTZ adapter to the camera before trying to attach your F-mount lens. You could jam it into the sensor or the camera’s sensor guard if you forget to do this. Configure the lens in the Setup Menu After setting up this lens, select it by the Lens number in the Setup menu. Keep the camera in the Aperture Priority mode. The EXIF data will record the ISO and shutter speed, but it won’t know what aperture you used, so it will always display f/2.5 for this lens. Don’t worry; the exposure will be correct. For quickly selecting this lens in the future, I’d recommend that you assign a button via the Custom Settings , Controls menu “f2”, such as the “Audio” (microphone) button to Choose Non-CPU lens number. If you do that, then you can hold down the assigned button and spin the rear dial to quickly set the lens number. If you forget to set the lens number, then the EXIF data will be incorrect; the exposure will still be okay. Set up Vibration Reduction (IBIS) Activate Vibration Reduction You’ll probably want VR to be active, which is set up in the Photo Shooting menu. Some people call this feature IBIS, or in-body image stabilization. Select the VR style you prefer Set up the style of vibration reduction that you prefer. The viewfinder seems smoother to me when using “Sport” VR. The horizontal stabilization will automatically turn off while panning horizontally. It’s okay to leave VR on when using a tripod or monopod. Normal mode is more effective than Sport mode, so this is preferred when the subject is static. I assigned VR to one of the options in the “i” menu, so that I can toggle Sport/Normal easily. You can customize the “i” menu via the Controls “f1” menu in the Custom Settings menu. F-mount lenses that have a VR switch will automatically disable in-camera VR. Fortunately, the Z9 IBIS automatically locks in place when the camera is turned off. Many cameras don’t lock their sensor when powered down, which can lead to damage when cleaning the sensor. Make sure extra features are displayed To enable viewing things like the histogram in the display (the viewfinder or the rear screen) you need to configure the “view mode”. Navigate to the Shooting/display menu Select the “Show effects of settings” in View mode d9 Set up Virtual Horizon Go to Custom Settings d17 to select the virtual horizon style If you want to add the virtual horizon, then pick the desired style to use in the Custom Settings d17 as shown above. Set up Focus Peaking Next, you’ll want to configure focus peaking. I think that the low-sensitivity focus peaking is totally useless. Pick the maximum sensitivity (3), in order to get precision manual focus. I find focus peaking is crucial for proper use of any manual-focus lens (or for the manual-focus mode on auto-focus lenses). Go to the Custom Settings a13 “Focus peaking” menu Activate focus peaking Focus Peaking sensitivity selection a13 Focus Peaking highlight color selection a13 Some subjects end up being the same color as the focus-peaking color. To avoid this frustration, you can just pick another peaking color to use in this menu. Focus-peaking The shot above shows focus-peaking on the rear display, without showing any extra data. You would of course typically use this same feature while looking through the viewfinder instead. Customize your viewfinder and rear display Rear display options configuration d18 To set up the rear camera display, go to the d18 Custom monitor shooting display. You can set this up like your viewfinder display, but you can also configure it differently, if you prefer. You can set up 5 different rear displays, which are selected during shooting via the DISP button. To avoid confusion, I’d suggest you set up the first 4 displays to match the options that you configure for the viewfinder display. Select the monitor display to customize “d18” Pick the display number to customize, and hit the right-arrow to pick which options you want in it. You don’t have to use all 5 displays, if you don’t want to. Simply un-check the display number(s) you want to skip. Press the DISP button while using the rear display to cycle through each enabled display option. Select the viewfinder display to customize “d19” Go to the custom menu option d19 to set up what the viewfinder display options will look like. Again, you can cycle thorough the different displays (up to 4) using the DISP button. Selected options for the #3 viewfinder display “d19” The shot above shows that the virtual horizon and histogram are among the options that will show up for Display #3 on the viewfinder display d19. You can make the viewfinder as crowded or as sparse as you wish. The setup procedure is just the same as the rear screen monitor setup (d18), except the viewfinder only has 4 displays instead of 5. These display options aren’t needed specifically for using a manual focus lens, of course. Note that for old non-CPU lenses, the displayed f-stop will only ever display “F—”. In aperture-priority mode, however, the shutter speed will adjust automatically as you twist the aperture ring, in order to maintain correct exposure. Switch between custom displays in viewfinder or rear screen The “DISP” button is next to the “AF-ON” button Press the DISP button repeatedly until you see the configured display you’re interested in using. Focus-peaking in action The busy-looking rear display is shown above. The red speckles on the statue face show the zone of sharp focus, courtesy of focus-peaking. Notice that the f-stop shows up as “F—“ above, since the lens can’t tell the camera what the aperture setting is. The viewfinder display will show the same focus-peak speckles as the rear display. The wiggling hand icon above (next to the “105mm”) shows that in-camera vibration reduction is active, too. The “A” in the top-left corner indicates the camera is in aperture-priority mode, and the “MF” indicates the lens is manual-focus. Unfortunately, you can’t scooch the histogram display more toward the edge of the screen. It’s placed in a better location in the viewfinder display than the rear screen. You can configure the viewfinder to have the same level of detail as the rear display, if you wish. I’d recommend that at least one of the display choices be set to have a minimum of detail selections, since too many selections can make the display too busy and distracting. Each mode will still show the focus-peaking. Summary With so many options that you can set, it seems like a nightmare to configure an old manual-focus, non-CPU lens. The thing is, you only need to do this once. The only setup that needs to be repeated is the Setup Menu Non-CPU lens data configuration for other manual lenses you use. Thanks for breathing new life into my 105, Nikon! Now, please make an adapter for the screw-drive lenses. By the way, a guy named John White does conversions of old lenses to at least make them fit on newer cameras. He has a cool compatibility chart of what fits on what. Here’s a link to his chart: You should probably read this chart before you start trying to mount lens A on camera body B. The non-Ai lenses need no modifications to work on the FTZ adapters. By the way, there are also third-party adapters to enable shooting nearly any non-Nikon lens on the Nikon Z-mount cameras. But that's a topic for another day. Happy shooting.
- Make a 3D Focus Stack Movie
Helicon Focus is of course known for its software for stacking photos. How about making a movie of a stack? Huh? This is really cool. And pretty easy. First things first. I use my Nikon D850 to get photos to combine into a focus stack by using its “focus shift shooting” feature. I use this mostly for macro photography, using my Micro Nikkor 105mm f/2.8 AF-S lens. I grew tired of always setting up a tripod for focus-stack shooting. I discovered that I could make a rig that made shooting these stacks pretty easy and “good enough”. My focus-stacking software is good at aligning my photos, and it automatically corrects for any of my “wiggle” when shooting. A typical video made from a focus stack Helicon Focus has found a way to combine the photo slice depth information into a 3D model, and then convert it into an MP4 movie. What’s so cool is that the video has everything in focus all the time. Any conventional video would have paper-thin focus. I could imagine doctors, for instance, finding it really valuable to have videos of small structures totally in focus. Seeing something from even slightly different angles is much more informative than a single shot. Home made camera gun stock The rig shown above lets me get pretty steady macro focus stacks by leaning against stuff or pivoting on its little monopod. The D850 can very rapidly do a bunch of focus-shifted shots, which limits the shot-to-shot wiggle. There are lots of examples on the web to show you how to make or obtain a rifle stock to hold your camera. Neewer LED ring light on Micro Nikkor 105mm If the light gets too dim, I have an LED ring light powered by AA batteries that screws onto my lens filter threads. It’s very portable and pretty light (no pun intended). I did have to modify this light by painting its inner diameter with black paint to control glare. Once I get the (raw-format) shots, I just mouse-drag them into Helicon Focus to make a focus stack. When I click on the “Saving” tab, there’s an option to “Export 3D model”. Use “Export 3D model” Helicon 3D Viewer The “Export 3D model” starts up the Helicon 3D Viewer. You get to see a movie of your focus stack! You can alter things like the rotation angle, which lets you view it from a different angle. You can also change lighting and zoom in. I select “Save video”, and I can save this movie in my desired resolution and fps. The number of rotations around your subject can also be configured. The movie format is H.264-MP4. I think that you’ll prefer to have a black background for your subject, or else zoom in prior to saving the movie. The finished video A video after using the Helicon zoom feature
- Helicon Focus versus Combine ZM for Focus Stacking
I have used Combine ZM (and Combine ZP) for many years when I wanted to perform focus stacking, but I recently switched to using Helicon Focus. I thought I’d share a few reasons for making this switch. Combine ZM focus stack, 20 shots of a kangaroo paw Before I begin, I should make some explanations for people that aren’t familiar with the concept of focus stacking. Stacking is a method to combine a series of photos that have overlapped zones of sharp focus, ignoring the portions of the shots that are out of focus. This technique is useful for landscapes, where you want to get everything from the foreground to the background in sharp focus. The more common use of focus stacking is for macro shooting, where a typical individual photo only has a paper-thin depth of focus. I have a link to an article here that I wrote showing typical usage of Combine ZM here. As long as you stick with shots that don’t go beyond magnifications of roughly half-life-size, you can often get by without even having to use a tripod. Both of these programs have the capability to align the shots and fix minor misalignments. Cameras like the Nikon D850 and Z9 have built-in “focus shift shooting”, which makes it really easy to automatically get a stack of properly-overlapped shots. The more traditional method to get stacked shots is to use a macro bellows with a focusing rail, which is also the best way to get high magnifications. I own the Nikon PB-4 bellows for this purpose. The focus stacks in this article were made using a Nikon D850 with the 105mm f/2.8 AF-S Micro-Nikkor. I used the built-in focus-shift feature. It bears mentioning that Combine ZM is free, but Helicon Focus is not. Also, Combine ZM/Combine ZP is no longer supported, while Helicon Focus is still being supported and enhanced. Also, Combine ZM can’t be used with Mac computers; it requires Windows. Helicon Focus will work with both operating systems. You can use the older Combine ZM program in basically the same way as Combine ZP, but it will have fewer stacking algorithm options. The “P” in “ZP” stands for “pyramid”, which is a newer stacking algorithm option. If you only rarely do focus-stacking, and are willing to put up with some compromises, Combine ZM can do the job. If you need more flexibility and speed, you might opt for Helicon Focus instead. Also, you can get a free trial of Helicon Focus to try it out before you decide to buy it or not. How Combine ZM Works The first thing you’ll need to do before stacking your shots with Combine ZM is to convert them into 16-bit TIFF (for maximum quality). Combine ZM doesn’t understand camera raw-formats. Also, if you have lots of shots to stack, this program tends to fail when using high-megapixel files. I tend to switch to DX mode on my Nikon D850 to reduce file size. These concerns aren’t an issue when using Helicon Focus. The link provided above gives an example of how to convert the photos. Open up the Combine ZM program, and start by clicking the “Enable Menu” icon. Next, select the “File | *New” option and select the photos in the folder with the TIFF pictures that Capture NX-D (or whatever converter program) just made. File loading progress screen Wait until all of your (Tiff) files are loaded. If you didn’t use a tripod, select the “Macro | Align and Balance Used Frames (Thorough)” option. The program then proceeds to analyze, align, and exposure-balance the shots. The photos are shifted/rotated/scaled in order to prepare them for stacking. A message “Finished Executing Align and Balance…” is displayed when this step completes. Be patient. If you happened to use a tripod for the focus-shift shooting, then you could simply skip the step above and go straight for the “stacking” step that follows. The Helicon program will automatically align shots as needed. ‘Do Weighted Average’ macro progress screen Next, select the “Macro | Do Weighted Average” option. The program will proceed to focus-stack the aligned images. Did I mention that patience is a virtue? The Helicon program understands how to use most GPUs, and is much, much faster at stacking in that case. When it completes, crop the central portion of the finished image. The borders have a sort of mirror-image effect, which needs to be cropped from the final image. The Helicon Focus program automatically crops off the edges of the stacked photo, so this step is unnecessary when you use that program. If you have defects in your output results due to things like wind, you’ll need to edit the files in other editors to make use of healing brushes, etc. For most stacks, the results are excellent. Most problems are user-caused, such as uneven focus shifting or wind-induced subject motion. How Helilcon Focus Works Helicon Focus focus stack closeup of a kangaroo paw (15 shots) The shot above is from a different set of 15 shots than the photo at the top of this article. This shot is the un-cropped result. The Helicon Focus Welcome screen After you start up Helicon Focus, you see a prompt to simply mouse-drag the set of photos to be stacked onto the main screen. You don’t need to bother with conversion into TIFF format first; Helicon Focus understands your camera’s raw-format, too First image in the stack After dragging your photos onto the main screen, you’ll see the screen as shown above. Your first shot of the stack is shown. You can select some other shot to view it, if you wish. You should select which stacking algorithm you want to try next. I’ve selected the “Method B” algorithm, or “depth map”. Beneath the algorithm choice are input algorithm values you can play with, if you don’t like the defaults (here, ‘Radius’ and ‘Smoothing’). The rendered focus stack If you’re unhappy with the results, you can try another stacking algorithm, or different adjustment parameters for the selected algorithm. If you have some defects in the stacked shot (such as multiple branches where there should be only one, but it was windy) you can select “Retouching”. “Retouching” tab There’s an option in the “Retouching” screen to let you clone a piece from one of your selected input files over the defect in the stacked file. You can set the brush diameter (size), its hardness, etc. This is good for getting rid of multiple branches, insect antennas, etc. that resulted from image movement between frames. There’s a tool to smooth over image defects, too. If you mess up, there’s an “eraser” to un-do your edits. “Saving” tab The “Saving” tab is where you can save your finished stack in the desired file format (Tiff, jpeg, png). But wait, there’s more. Helicon 3D Viewer If you select “Export 3D model” you can save the stack as 3D, and you can actually make an MP4 movie of your subject rotating around in space. It opens up the Helicon 3D Viewer, which allows saving your stacked image data in various 3D formats or even a movie with selectable resolution. Summary Generally speaking, the results from Helicon Focus look just the same as the results from Combine ZM or Combine ZP, except that I always have to crop off the stacked photo output edges from the Combine ZM results. Here’s my list of the main advantages I have noticed that Helicon Focus has over Combine ZM. Raw-file support Handles more files and larger file sizes Built-in retouching tools GPU support for speed (newer GPUs) Invoke it from within programs such as Lightroom Automatic photo alignment correction Works in Mac operating systems Helicon Remote control for many Nikon, Canon, Sony cameras. Helicon 3D Viewer to save images in various 3D formats or video. You can make macro panoramas from a grid of photos This program, and associated Helicon programs, can actually do a lot more than make a focus stack. There is a Helicon Remote option that you can buy that will automate getting the stacked images for selected Nikon, Canon, and Sony cameras. Since my Nikon D850 already provides this service to me (via focus-shift shooting), I don’t need that Helicon offering. The ‘focus’ of this article is simply focus-stacking, so I stuck to that topic alone. I’m not actually trying to sell you anything. I don’t get any income from doing this, if you wondered.
- Reasons Why You Would Actually Want To Use DNG Format
I’m a hardcore RAW format shooter. For Nikon, raw is spelled “NEF”. I never take jpeg photos in-camera, since it immediately puts you into a straitjacket and limits the possible future of your pictures. Why in the world might I consider using DNG format instead of sticking with the Nikon NEF format? Let me try to explain this act of seeming lunacy. First of all, what exactly is DNG? This is an Adobe invention, and it stands for “digital negative”. This was their attempt at defining a “generic” raw format they someday everybody would standardize on. That day never came; hardly anybody uses DNG. What follows are some reasons that you might want to consider using DNG. The DNG format doesn’t lose any quality; it holds the same image information that Canon, Nikon, Sony, et al. raw-format photographs hold. My Nikon testing shows that the DNG format files are actually smaller than even my lossless-compressed NEF files. The difference isn’t huge, but often in the range of 8 to 10 percent. I don’t ever recommend deleting your original raw photos in favor of their DNG versions, but you might consider archiving the original raw photos to offline storage and just use the smaller DNG photos for editing. You can use new cameras with old software. Since every camera model’s raw format is unique, it’s very common to have software that cannot recognize your new camera raw files. Most photo editors, however, do understand the DNG file format. Also, most photo editors let you update their DNG version to newer DNG versions as they become available. If your photo editor cannot use newer-version DNG files, then the DNG converter program actually lets you convert into an older version of DNG that you can use with your editor. The DNG converter 14.4 is supposed to even support the new Nikon Z9 HE* raw format. This would then let you use the very small file size in your editors that at least understand newer DNG formats. I don’t (yet) have a Z9, so I can’t verify this claim. I have heard that Apple/Mac may still have trouble with this new version, but Windows 10 is fine. Adobe Digital Negative Converter Program The DNG format continues to be supported by Adobe. They still offer their “DNG Converter” program, and it’s free. Here’s a link to their Windows/MacOs converter program: https://helpx.adobe.com/camera-raw/using/adobe-dng-converter.html The Adobe DNG converter program is very fast, and it lets you batch-convert the files as well. In this way, it takes very little labor or time to convert your shots. For programs that only support specific older DNG formats, the DNG Converter program lets you convert your camera raw photos into a specific version. An example of this is Adobe Photoshop CS4, which can only use DNG files up to version 5.7. Convert into a specific version of DNG for older programs After installing the Adobe DNG converter, you can execute it in Windows by running it from the Programs list. The most common way to use the DNG converter is to just click on the “Select Folder…” button that lets you tell it where your raw (e.g. .NEF, .CR2, etc.) files are. This button is located in the “Select the images to convert” section. Next, click the “Select Folder…” in the “Select location to save converted images” section. This assumes you also select the “Save in New Location”; you can also combine the new DNG files in the same folder as your raw shots, if you wish. If you need the DNG version number to be compatible with older programs, then click the “Change Preferences” button to pick another version. Finally, just click the “Convert” button to start converting your camera’s raw files into the DNG format files. Your original raw files won’t get modified, to they’re safe. Summary Knowledge is power, and it’s better to know about what the DNG format can do for you than to remain ignorant about it. Adobe had a good idea, even if it never gained much traction. If you, like me, want to keep using older photo editors such as the stand-alone versions of Photoshop or Lightroom, then DNG may be the only option in the future to keep using raw-format camera files. Long live Raw.
- Lightroom Exposure Editing Tips
Lightroom has some very confusing terminology, which keeps users from making effective edit adjustments. I’d like to concentrate on adjustments that control the light levels in the finished photo in this article. You’ll find that Lightroom’s use of the word “exposure” isn’t what you think it is. Many photographers are familiar with Ansel Adams’ Zone System. Ansel divided the photographic light range into eleven zones, using Roman numerals 0 through X. Zone 0 is for pure black, with middle-gray being Zone V, and pure white falling on Zone X. Each zone ‘size’ is the same. The division of light into eleven zones was based upon the dynamic range capability of the best films of the day, combined with clever film processing tricks. This work was carried out in 1939 by both Ansel Adams and Fred Archer. The developers of Lightroom decided to use a modified zone system, which is based on only 5 zones of light. They also came up with names, instead of numbers, to identify the zones. These zones, starting with the darkest tones, are called Blacks, Shadows, Exposure, Highlights, and Whites. The Blacks zone range In the shot above, you can see the Blacks light range depicted in lighter gray. It covers roughly the lowest 10% of the total light range, representing the lowest tones of the image. Despite its name, adjusting this range will affect the full color spectrum, and not just ‘colorless’ shadows. The Shadows zone range The Shadows light range shown above extends over approximately 20% of the total light range. Again, you can see the width of this light range depicted as a lighter shade of gray in the screen capture. The Exposure zone range The Exposure light range extends over about 35% of the whole range, making up the widest adjustment range of any of the sliders that control light intensity. These are all of the image mid-tones. The Highlights zone range The Highlights light range covers the lighter tones, with a width of about 25% of the overall light range. The Whites zone range The Whites light range covers the lightest tones, making up a narrow band of about 10% of the whole light range. The whole light spectrum gets adjusted in this zone, and not just ‘colorless’ white values. This range is critical to control the brightest zones of your photo, so that you don’t end up with disturbing blank-white areas without any texture in them. I think it’s unfortunate that the Lightroom developers came up with a set of names that sound like they’re designed for different purposes, and they’re not even set up to cover the same width of a light zone. The Exposure zone is much wider than the other zones. The five light adjustment sliders These five sliders that control light levels have a little bit of overlap in their ranges, so that you don’t end up with an awkward “stair-step” adjustment between zones. The Clarity adjustment alters the contrast in the Exposure light range (the mid-tones) only. This makes it more selective than the Contrast slider, which alters the contrast range in all five of the light zones (from “Blacks” through “Whites”). Summary Without a good understanding of what the light-adjustment sliders in Lightroom do, you’re not going to achieve optimal results. These controls will reward you with better results if you can shoot at lower ISO values, since that will allow your camera to capture a wider dynamic range of light. Be aware that these adjustment sliders don’t relieve you of the responsibility of getting a good in-camera exposure; always avoid the garbage-in-garbage-out scenario.
- Get Wide-Angle Shots Without Using a Wide-Angle Lens
You see a fantastic wide-angle shot present itself, and it dawns on you that you don’t have the right lens with you. Or it’s really rainy or windy and the last thing you want to be doing is changing lenses. Assuming it’s not a moving target, the answer to your problem is the panorama. Super wide angle shot (using Zoner Photo Studio) With tools like Lightroom or Zoner Photo Studio, you can get fantastic panoramas, even if you don’t have a tripod. The modern editors are so smart that they can combine hand-held shots even when there are uneven overlaps or shots with slight rotations. You will often find that panoramas can be much sharper than using a wide angle lens. The central portion of almost any lens is sharper than its edges, and making a panorama will use primarily the middle portion of each individual shot. It nearly always works out better to take your overlapped photos in portrait mode, so that the panorama will be taller. I always use a battery grip on my cameras, which makes for much more comfortable vertical-format shooting when not using a tripod (I typically don’t use a tripod to shoot panoramas). It’s even possible to combine multiple rows of shots, when vertical-format photos still don’t give you the coverage you want. I usually try to get about a 30% overlap in my shots; digital is cheap. You can get any height-to-width ratio that suits you with this technique. Not all photo editors can accomplish multi-row panoramas, but Lightroom can. In this article, I’ll concentrate on showing you how to make panoramas with both Lightroom and Zoner Photo Studio. Lightroom Panoramas: Here are the basic steps to make a panorama in Lightroom. Library Module OR Develop Module Select shots to combine Photo | Photo Merge | Panorama Pick Spherical/Cylindrical/Perspective Auto Crop checked Merge In the following example, I had two rows of shots and let Lightroom figure out how to combine them. It creates a DNG output photo that you can edit further or export it to another file format. Lightroom Photo Merge to Panorama I selected 8 photos to merge into a panorama, divided into two rows of four shots each. These shots were made handheld, to show how good Lightroom can be at combining shots. It figures out how the shots are combined, even without being told if there are multiple rows. I chose a demonstration subject that has lots of straight lines in it, so that the manipulations to the final panorama are clearer. Each of the vertical-format shots were made at 70mm. Projection choice: cylindrical The panorama preview above shows “cylindrical projection”. It’s most accurate showing distance from the camera, but the straight horizontal lines look very curved. Projection choice: perspective Switching to “perspective projection”, the curved horizontal lines are nicely straightened. Since the shots were made hand-held, there’s a large amount of horizontal distortion remaining after crude manual alignment. Merged panorama The shot above shows the merged shots. There’s still un-corrected horizontal perspective distortion. But don’t give up on this shot just yet… Horizontal perspective repair effort Using the horizontal perspective slider, I did a quick fix to get the lower wall parallel to the edge of the frame. Remember to check the “Constrain Crop” box before you’re done. Voila, the walls don’t have that awful tilt to them. Final “wide-angle” shot from 70mm lens The final Lighroom shot gives no clues that it was made from multiple shots, and even from multiple rows. Since it’s made from the central portion of the individual shots, it’s sharper edge-to-edge than most wide-angle lenses could produce. Zoner Photo Studio Panoramas: Go to the “Manager” Navigate to where your photo files are located Select the range of photos to combine (Ctrl-click) Select Create | Panorama Verify the selected shots in the Panorama dialog Click “Next>” Verify the order of the photos is correct Click “Next>” Click “Join” Accept the defaults to crop into a best-fit rectangle You can edit further, and then save it as Tif format. The Zoner program is a bit more complicated and a bit less capable than Lightroom for making panoramas. One of the more major Zoner limitations, at least in my version 15, is the inability to make panoramas out of multiple rows of photos. Using the same 8 shots (2 rows) in Zoner Photo Studio Note the disaster above when Zoner tries to join the two rows of shots together. Just stick with a single row of shots instead, and it makes perfectly fine panoramas. The infrared panorama at the top of this article was made using Zoner. It was comprised of 7 portrait-mode shots in a single row. Summary Yes, it’s more effort to get wide-angle shots using panorama techniques, but it’s better to “get the shot” than not. As an added benefit, your final shot is usually sharper and has more pixels to work with than a wide angle lens can provide.
- Arca-Swiss Camera Mount: Everything You Need to Know
Since the 90’s, the premium way to attach a camera or a lens to tripods, monopods, and gimbals is with an Arca-Swiss mount. There are many reasons why this kind of mount has become an informal standard today. The Swiss camera equipment maker Arca-Swiss Phototechnik AG developed a quick-release mechanism for their tripod heads. To say that it caught on is an understatement. There are almost zero professionals that don’t use Arca-Swiss mounts for their cameras and large lenses. A typical Arca-Swiss mount on a tripod The shot above shows a typical Arca-Swiss mount on a tripod ball-head. The little knob on the right is used to tighten the mating plate to firmly hold a camera or lens in position. Most Arca-Swiss hardware is made from stainless steel, anodized aluminum, or magnesium alloys. Plastic would be a bad idea. A large lens attached with an Arca-Swiss tripod foot The illustration above shows you a 500mm lens mounted via its tripod foot onto an Arca-Swiss attachment. The lens/camera combination is connected to the tripod exactly over its balance position, which provides maximum stability. For most zoom lenses, the balance point shifts with focal length, and the foot needs to shift to compensate for this. Your shots will be sharper when you are photographing while using a properly balanced system, at least at slower shutter speeds. There’s also much less stress on the tripod connection when it’s supporting a balanced load. The Arca-Swiss “standard” involves a 38mm wide mounting plate that has a 45-degree dovetail rail on two sides. This plate is held in place via friction by a “grabber plate” that is tightened typically by a screw with a knurled knob. Sometimes, manufacturers will make grabber plates that use a lever instead of a tightening screw, to allow for even faster attachment to the mounting plate. Arca-Swiss mounting plate attached to a lens tripod foot Many manufacturers continue to remain ignorant of the Arca-Swiss system, including Nikon. For this situation, there are separate mounting plates you can purchase and attach to their screw-mount tripod feet. The shot above shows a little “lip” on the right-hand top of the plate that keeps the plate from twisting during use. It also shows a little silver screw on the bottom-left, which will limit how far the plate can slide along the Arca-Swiss grabber plate. Some people prefer to keep a little screw on both ends of the mounting plate bottom, so that the plate can’t accidentally slide off of the grabber plate in either direction. The downside to this is that your grabber plate has to be opened really wide to let you lift the mounting plate vertically off of the grabber. Arca-Swiss mounting plate bottom view In the view above, you can see the stainless steel screw that is used to attach the mounting plate onto the lens tripod foot. The screw is in a groove that lets you slide the screw to align with the foot’s tripod screw hole. Sliding the mounting plate until its lip (on the upper-right side) is held against the lens tripod foot keeps it from rotating during use. Once aligned, the screw is of course tightened. The balance point will change if your camera has a battery grip attached or not, so you usually want to purchase a mounting plate that is long enough to accommodate both conditions. You might also have a heavy and a light camera, so you need the range in the mounting plate to handle both scenarios. I prefer a longer mounting plate, compared to the lens tripod foot, to create a “T” mount instead of an “L” mount. I get more balancing and carrying options this way. Use the tripod foot/Arca-Swiss mounting plate as a handle The “T” shape of the mounting plate on the lens tripod foot makes for a very convenient and secure carrying handle. This is a much safer way to carry the lens/camera combination than just holding onto the foot of an “L” shape alone, which could slip from your fingers. Look for Arca-Swiss mounting plates that don’t have sharp edges or corners on them, if you intend to use them for carrying purposes. Hold your camera/lens upside-down to find the exact balance point. You can try sliding your finger along the tripod foot until the lens/camera combination is level. Be sure to have your other hand underneath everything while doing this, so that you don’t accidentally drop anything. Gimbal with an Arca-Swiss attachment Gimbals use Arca-Swiss attachments, because the lenses attached to them need to be carefully balanced by sliding them along the grabber plate. Nikon lenses cannot be used on a gimbal unless separate mounting plates are attached to their tripod feet. Grabber plate with a tripod-mount screw hole. If you happen to own a tripod head that only has a screw to attach to cameras or lenses, you can buy an Arca-Swiss grabber plate that can be attached to your tripod head via the tripod’s screw. The grabber plate shown includes some built-in bubble levels (on the back side edges and the tightening knob). Arca-Swiss mounting plate for camera If you want to mount the camera itself onto an Arca-Swiss grabber plate, then you’ll need a separate screw-on plate that goes onto the bottom of your camera. The one shown above is quite minimal, but gets the job done. Camera “L” bracket There are also more elaborate “L” shaped mounting brackets for cameras with the dovetail grooves on both the bottom surface and one side of the camera (for portrait orientation). These are more sturdy, but it can get tricky to find one that doesn’t get in the way of something (such as the camera battery door). Summary Once you start using the Arca-Swiss system for your cameras and lenses, you won’t want to return to using tripod screws. The system is more solid, adjustable, and faster than using tedious tripod screws. Most of the items shown can be found for very reasonable prices, too (except that lens).
- Nikkor 500mm f/5.6 PF with Sigma TC-1401 Teleconverter Review
This is a combination that both Nikon and Sigma tell you not to do. So of course I had to try it out. The reality is that it works pretty well. The official name for this lens is the Nikkor AF-S 500mm f/5.6E PF ED VR. The Sigma TC-1401 is a 1.4X teleconverter, so you end up with a 700mm f/8 lens. Does this result in some limitations? Of course. Is it still worth it? Of course. Sigma TC-1401 and Nikkor 500mm PF on Nikon D850 First things first: if your camera doesn’t have f/8 focus points, then don’t use this combination. I use the combo on my Nikon D850 and D500 (for a 1050mm lens). This caution and most other cautions that follow would be the same for the Nikon teleconverter, too. Before I forget, I need to mention that 3D tracking focus mode doesn’t really work, since it’s pretty much limited to f/5.6 or faster lenses The Sigma TC-1401 only extends the lens by 20mm, and weighs 1460 grams (6.7 ounces), so you barely notice when it’s attached. Nobody would notice the TC in the shot above if I didn’t point it out. Focus accuracy isn’t entirely repeatable when using the TC, even in sunlight. Be sure to take a few extra shots of your subject, and you’ll be glad you did. The camera isn’t aware that there is a teleconverter attached, which means that the EXIF data will still register f/5.6 and 500mm instead of f/8 and 700mm. Also, the camera focus fine-tune data cannot be separately stored for the lens with and without the teleconverter attached. You’ll definitely need to calibrate focus differently when the TC is attached, too. VR seems to work just fine with this combination; you'll be happiest with "Sport" VR mode for moving subjects. Please note that you need to attach the TC to the lens before you attach the combination to the camera, or else autofocus won't work. Focus Speed I tested focus speed by using 120fps video to observe the focus scale; I set the lens on minimum focus and then focused on infinity in bright light. Minimum focus is 3 meters, or about 10 feet. I measured 0.400 seconds to focus, which compares to 0.308 seconds when not using the TC. I used my D500 camera, which focuses essentially identically to the D850. I got the time measurement by counting 48 video frames to finish focus, at 0.0083 seconds per frame. Watching the video of the focus action, I noticed that the lens would over-shoot infinity slightly, back up, and then stop at infinity. This focus-stutter happens much quicker than you can perceive with the naked eye, and can only be observed using high-speed video. Focus still works in shade, but it’s of course a bit slower and a bit less reliable than bright light. You’ll be a bit disappointed trying to follow action with this combination in the shade, although it’s not out of the question. The same caution applies to Nikon’s teleconverters, according to what I have read. Resolution tests I performed the resolution tests with the lens/teleconverter combination at 20 meters (about 65 feet). Shots look pretty sharp if the resolution stays above about 30 lp/mm. As you’ll see, that’s no problem with this combination, even wide open. Again, the EXIF data is incorrect for this combination, so the 700mm focal length is reported as 500mm, and shots at f/8 will show up as f/5.6 instead. I perform resolution tests using “live view” with contrast-detect focus, to eliminate focus calibration from being an issue. I set my camera up to use electronic front-curtain exposure to rid vibrations. I also use a wired remote release. Even contrast-detect focus gives variable results, so I pick my sharpest result (from 10 shots) to report. I always use unsharpened Raw-format shots for testing. Overall, the following tests show a resolution drop of between 18% to 27%, depending on the aperture (compared to not using a teleconverter). Considering that the focal length is 40% longer, this is much better than merely cropping a 500mm shot. MTF50 resolution, 700mm f/8 Peak center resolution at f/8 is 42.8 lp/mm, compared to 58.5 without the TC, or a 27% drop. Peak edge resolution is 44.3 lp/mm. Peak corner resolution is 36.4 lp/mm. This is shooting with the aperture wide open (f/5.6 marked, f/8 actual). MTF Contrast Plot, 700mm f/8 Lateral chromatic aberration, 700mm f/8 MTF50 resolution, 700mm f/11 Peak center resolution at f/11 is 44.4 lp/mm, compared to 54.3 without the TC, or a 18% drop. Peak edge resolution is 43.7 lp/mm. Peak corner resolution is 42.8 lp/mm. This is the best aperture for the combination (1 stop down from maximum). MTF Contrast Plot, 700mm f/11 MTF50 resolution, 700mm f/16 Peak center resolution at f/16 is 35.1 lp/mm, compared to 47.1 without the TC, or a 25% drop. Peak edge resolution is 35.4 lp/mm. Peak corner resolution is 34.0 lp/mm. MTF Contrast Plot, 700mm f/16 Samples 700mm 1/2000 f/8 ISO 4500. Cloudy conditions. D850 Pixel view 700mm 1/2000 f/8 ISO 7200 Deep shade. D850 700mm 1/2500 f/8 ISO 800 Sunny. D850 Pixel view 700mm 1/3200 f/8 ISO 800 700mm 1/3200 f/8 ISO 800 Conclusion Honestly, you don’t really even need to stop the lens down for great resolution shots. Don’t worry about the sharpness loss, but you’ll have to decide if difficulties with autofocus keep you from using this combination. Only using the camera f/8 focus sensors is a bit irritating. It’s a pain to have to remember changing the focus fine-tune calibration when adding/removing the TC, but such is life. Mirrorless cameras could rid this concern. Although the focus systems are supposed to have equal capabilities, my D500 seems to work better with this combination than my D850 in low light. Overall, not bad for a verboten combination.